HOW TO PLAN AND MEASURE FOR A GRID GALLERY WALL FEATURING FY!
Lin and I are finally in the last phases of this Santa Fe renovation and now we can finally concentrate on the decor element! This is the funnest part in my opinion and now it’s time to dress the walls a bit!
I personally love filling an empty wall with some very special pieces… as long as they are appropriately scaled for the space. And in our case, the primary suite just needed something on the wall that’s visible to visitors!
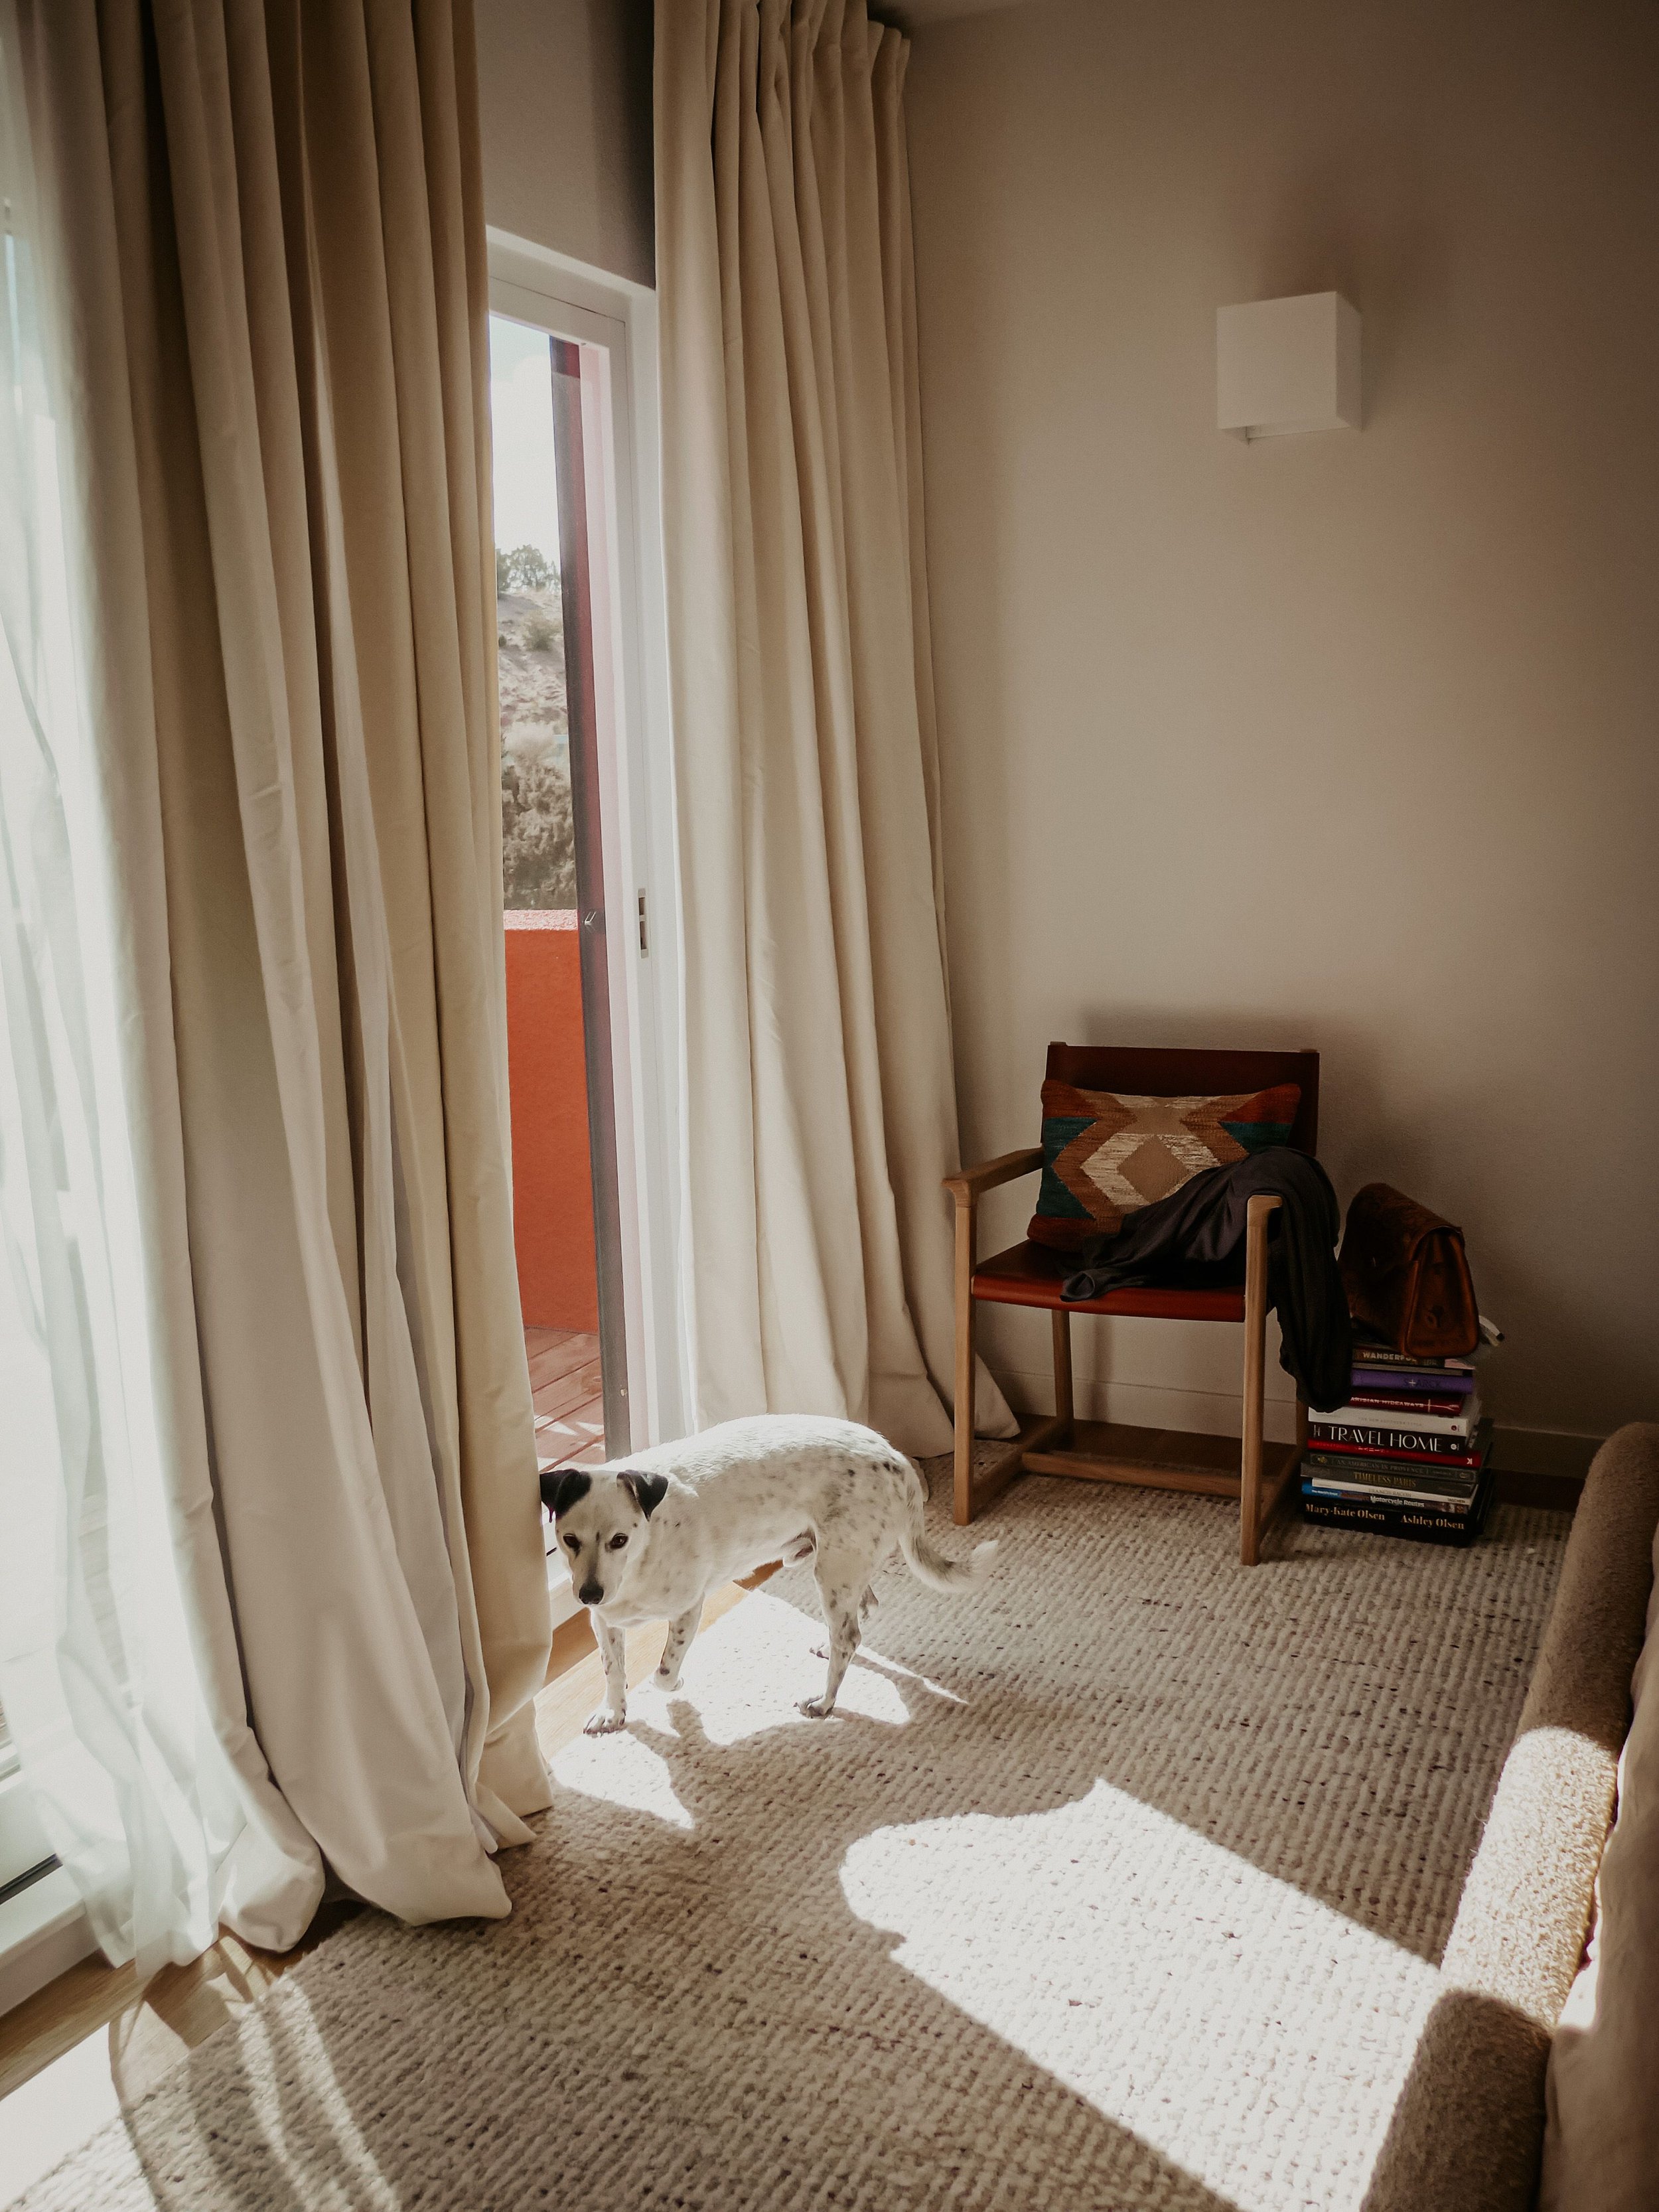

( this huge bare wall needed something)
So I partnered with FY! to create a gallery wall! But let’s be honest…I crave order and simplicity in the home--so we chose a grid-style gallery wall of similar, evenly spaced pieces! I think the grid-style also couples the drama and elegance of traditional gallery walls with sleek modern lines for an instantly luxurious interior which is just more my style. Symmetry and clean lines convey a modern look. Plus it’s high impact. All of the pieces come together to look like one big statement piece for that classic gallery wall look and I just really love how it looks.
And we chose one artists work for the project even though it didn’t start that way!! Design is always evolving, right?!
Don't let spacing and hanging your frames (tips on hanging coming soon) perfectly evenly intimidate you--I'll show you exactly how we did it and got it right! Lin is a bit of a perfectionist in this arena but I promise it’s easier than it looks even if you are not an architect. HA.
My top recommendation to you is before you order your art, consider the size and orientation of the space first! There is nothing worse than falling in love with pieces only later to realize they are not available in the right size. At this point you are so married to the original idea that it becomes harder to sway a different direction. When choosing artwork, you also need to know what size will work best for your space. If the artwork is too small, it will look awkward, and draw more attention to the blank areas of the wall than the artwork itself. Too big, and you overwhelm the space, making the area feel small and crowded.
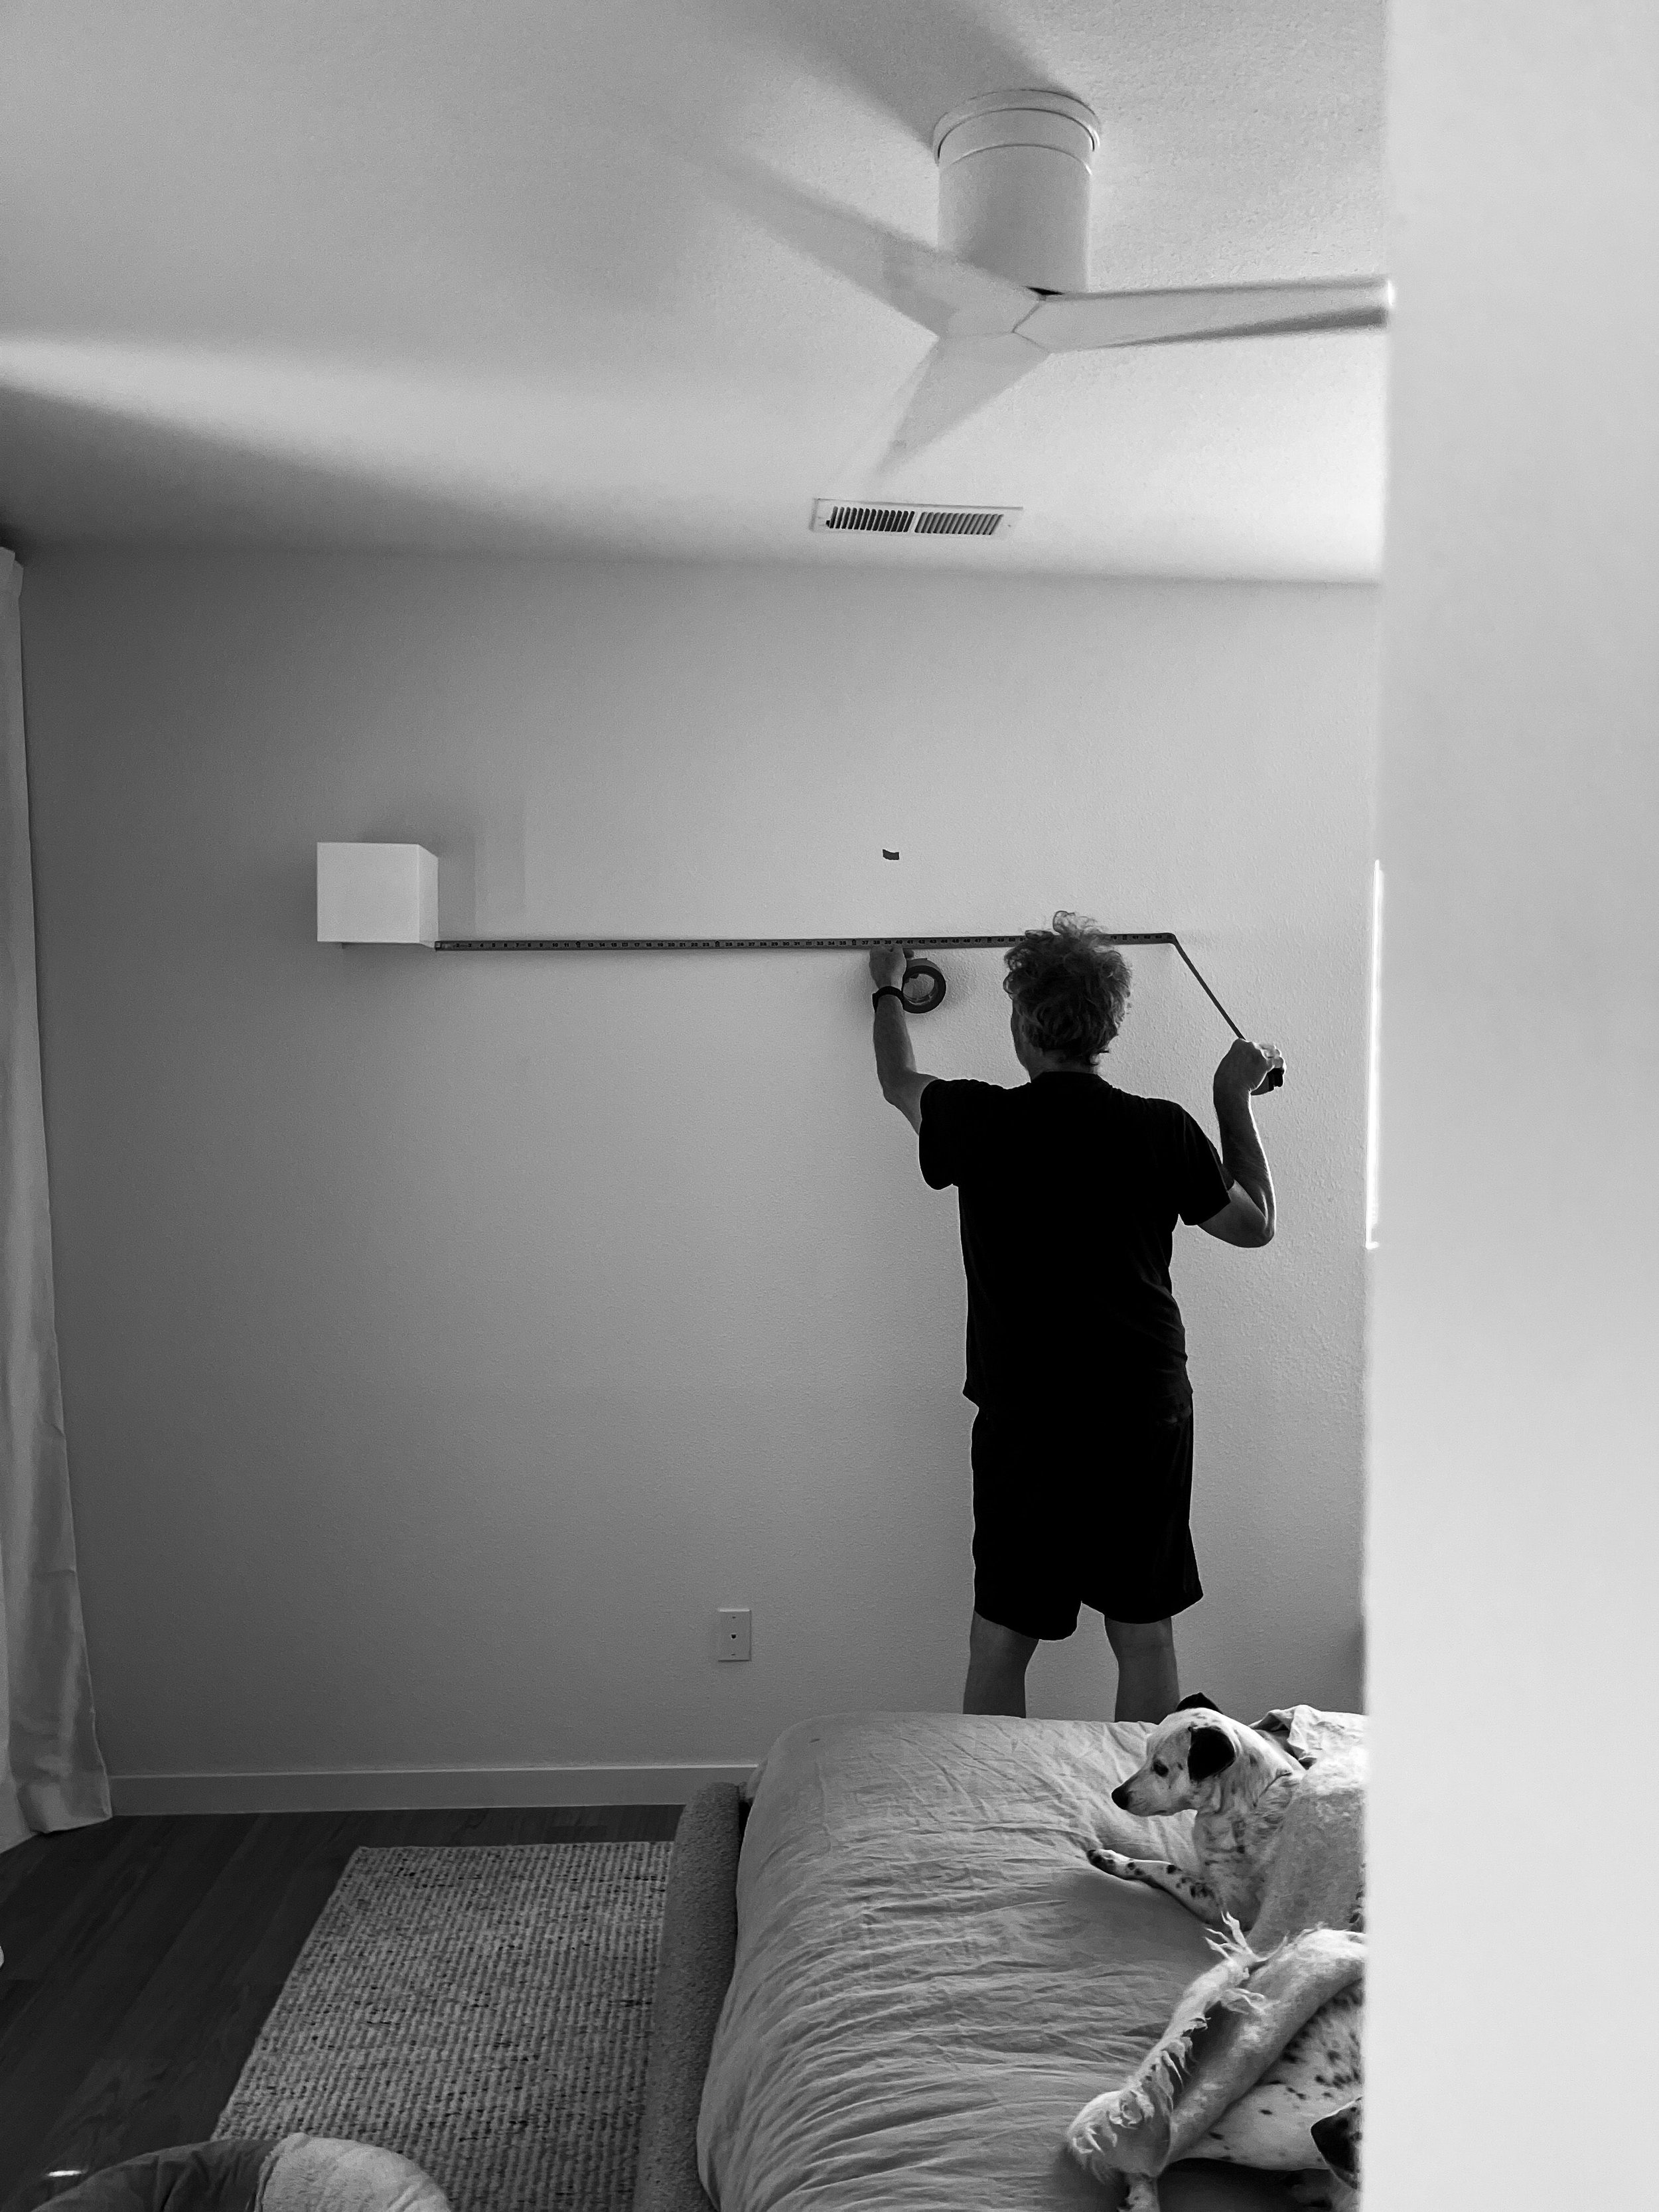
You may have heard that you are supposed to hang pictures and artwork at eye level, but this means different things to different people. Take Lin, for example. He’s 6’3″ tall, which is just plain tall. I can’t tell you how many times I’ve asked him to hang something, only to ask him to move it lower later on. And with the gallery wall…this is going to solve that whole eye level dilema.
So now let’s start our grid-gallery wall!
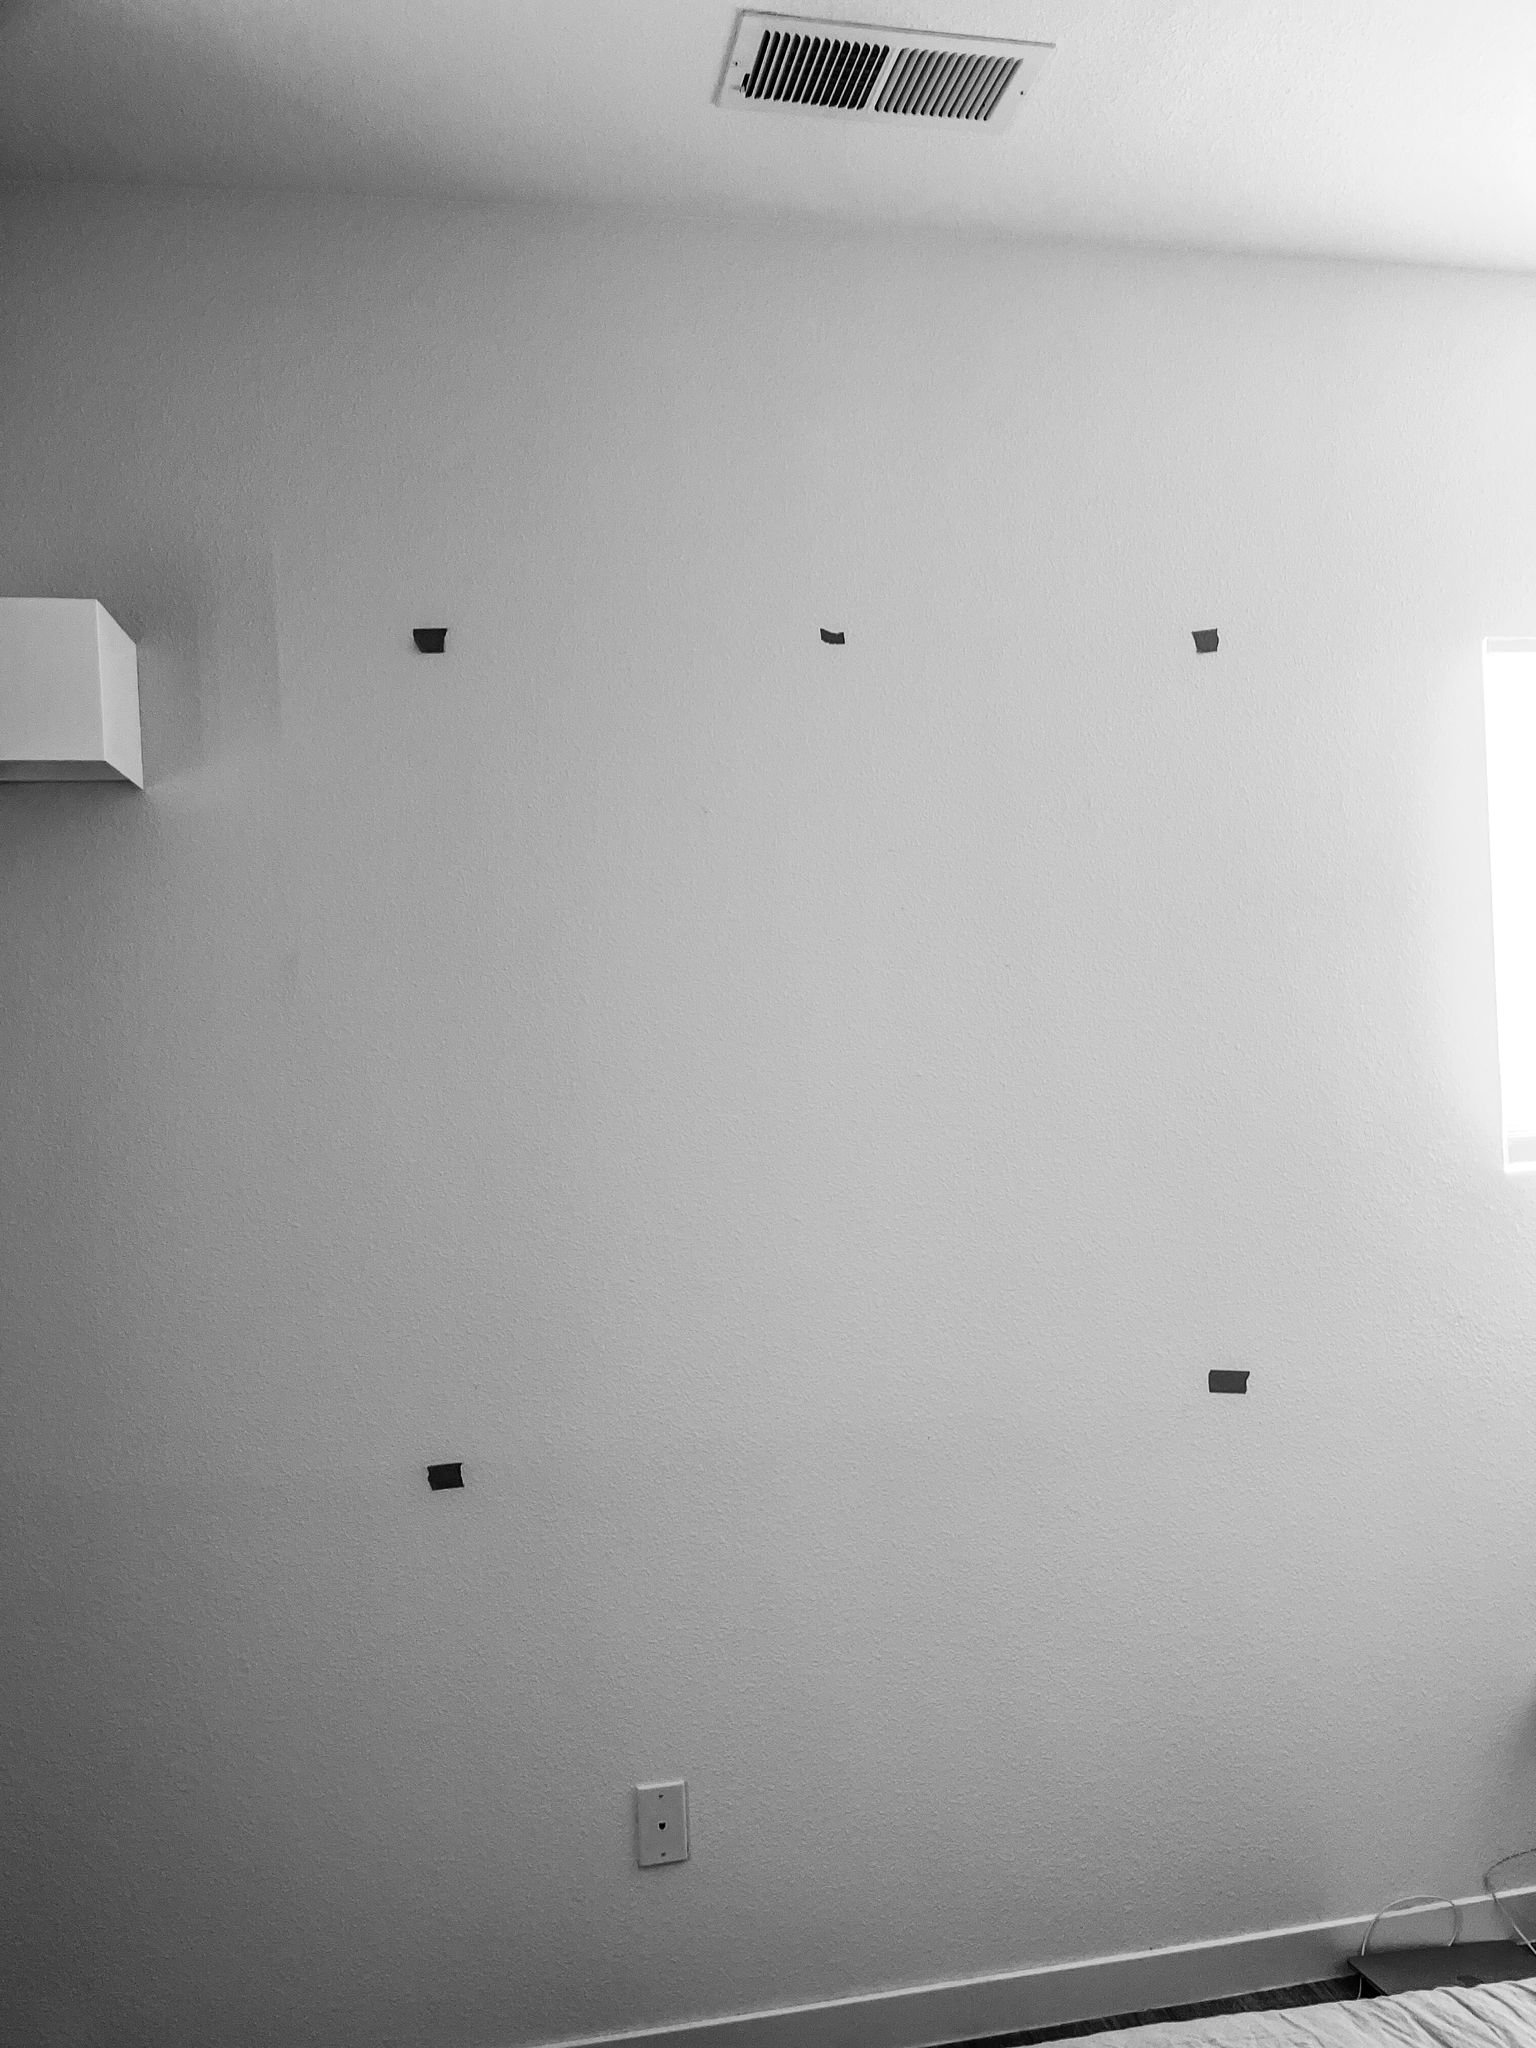
Measure the total space you want to fill.
Only measure the area you want to fill. You can use painter’s tape to mark off the area. Then decide on your arrangement. There are lots of choices, but you don’t have to feel overwhelmed. Start by choosing the grid’s orientation: horizontal, vertical, or square. ( or maybe a mix) They all look great, so choose based on the amount of space you want to fill.
Pick your pieces.
Maybe you love photography for your grid gallery wall, or you love art pieces? Just pick the same size (or photos or art can be trimmed to be the same size) And then think about whether you want a theme.
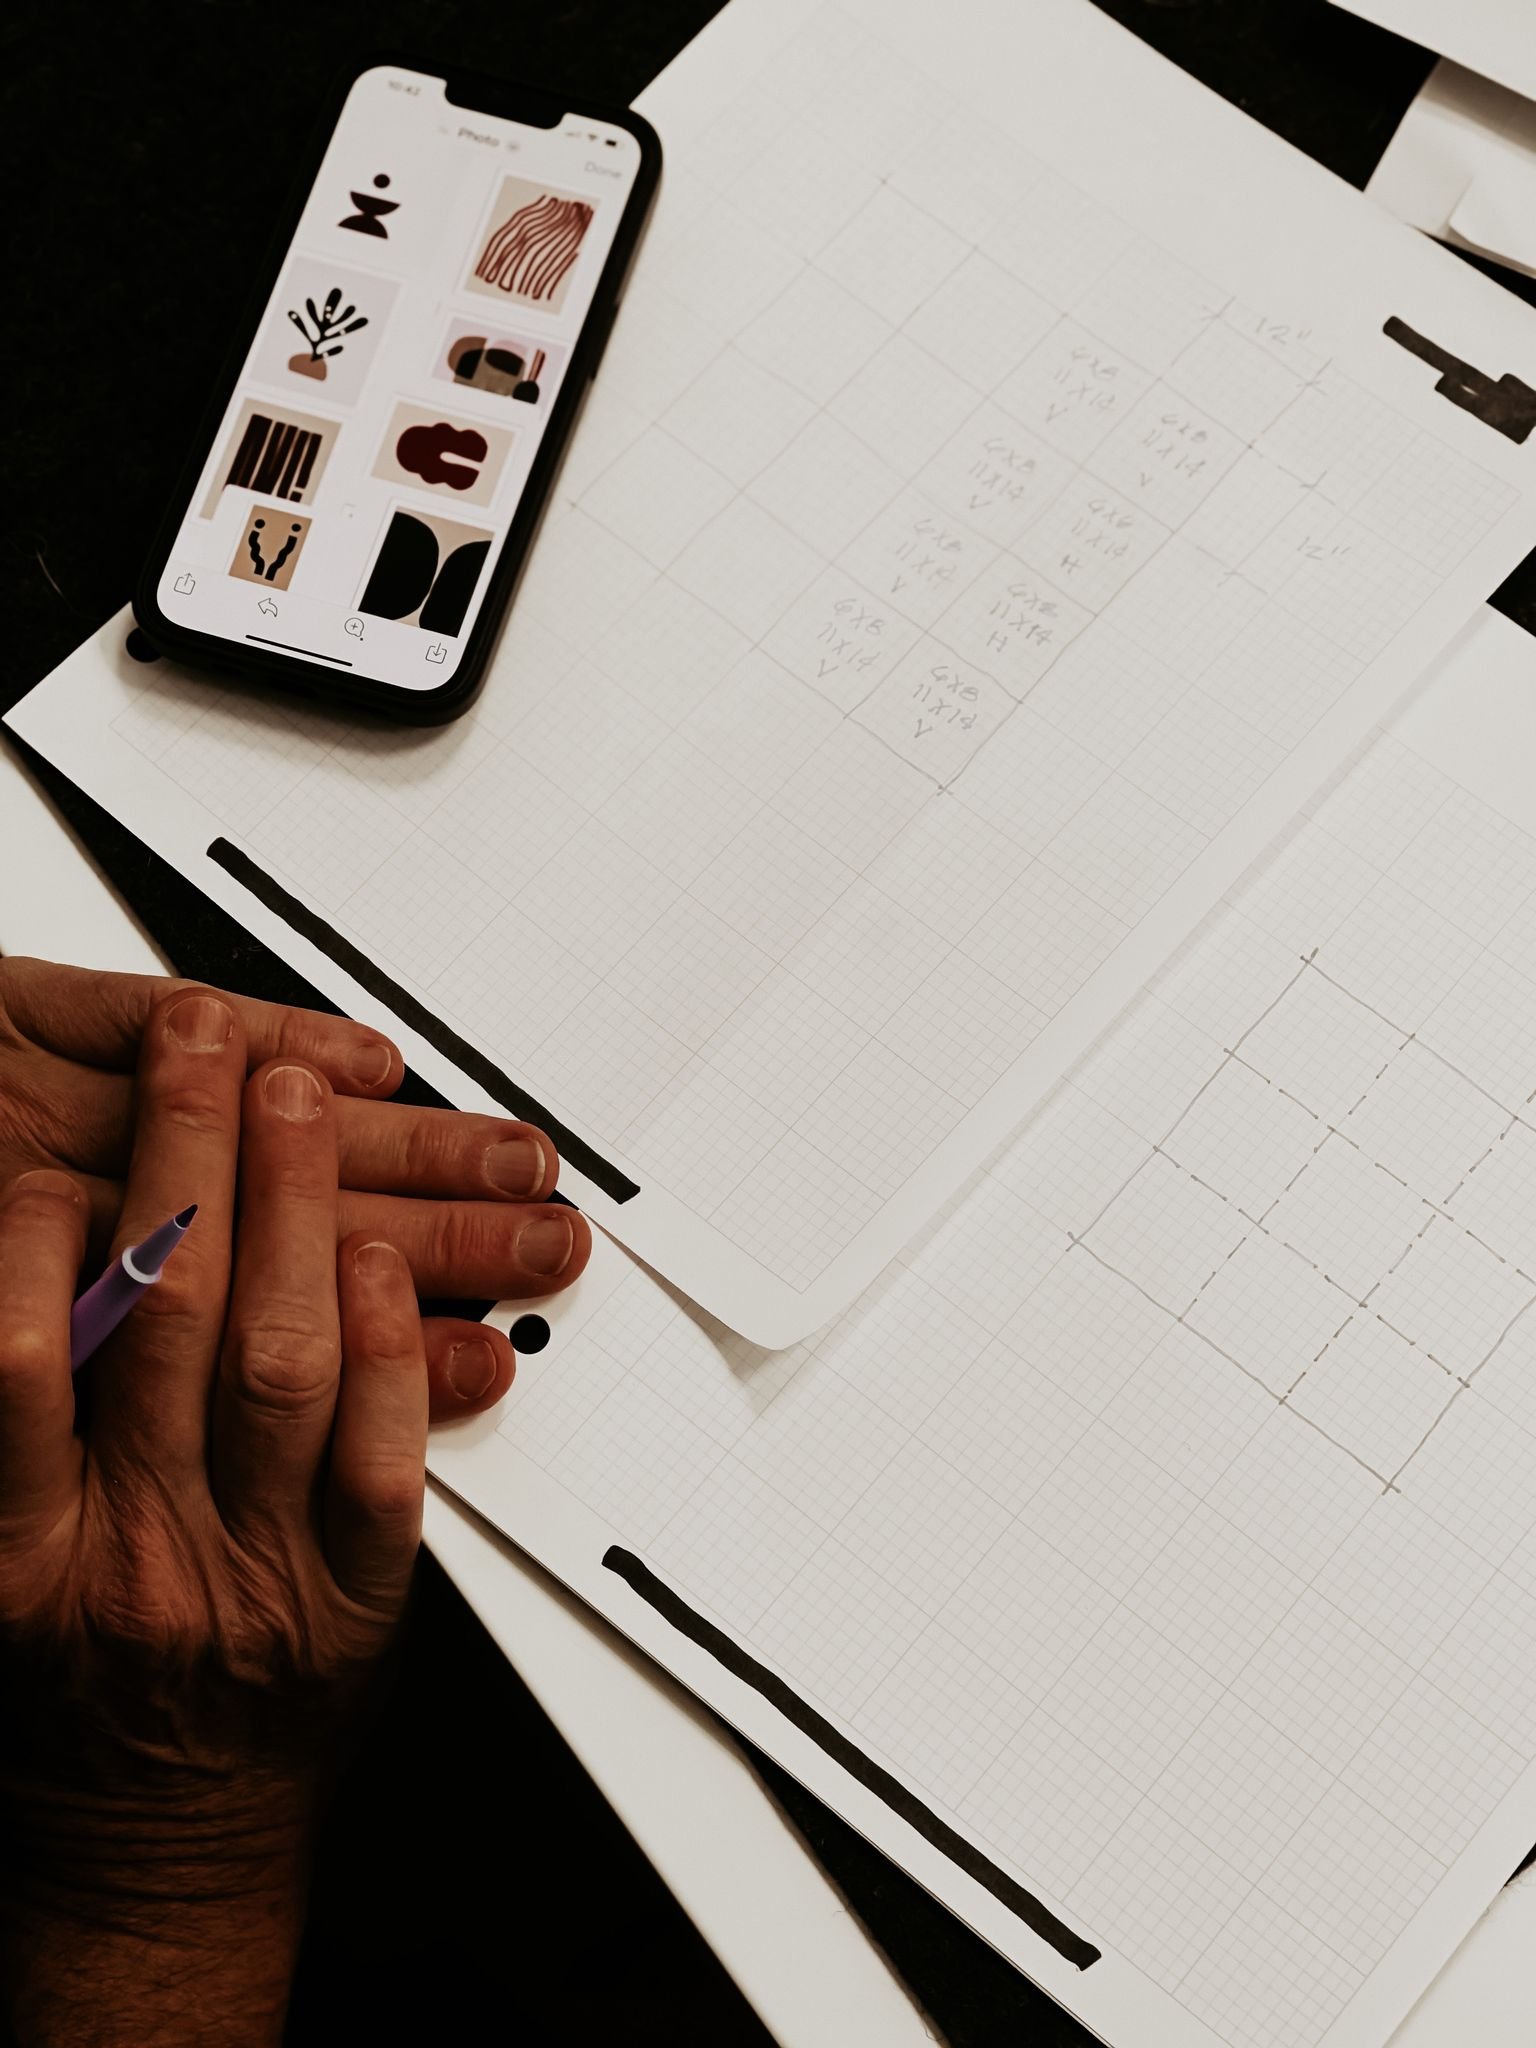
We chose our art from FY! I had worked with them before and really loved the quality of their pieces. Fy! is an app brimming with the world’s best home and living products. From big brands to emerging artists, we’ve got all the products and inspiration you need to start feeling great about your home. They are a team of passionate entrepreneurs, buyers, designers, marketers and developers based across London, Europe and the US. Together, they’re dedicated to their mission of creating the best way for shoppers to re-style their space.
Looking around through the Fy! app…fell in love with prints from Forn Studio. Anna Pepe’s work is just so beautiful. And we simply love her bold and powerful abstract artworks.
She is a contemporary artist who lives in Tbilisi, Georgia. Studying feminine beauty and architectural simple lines are the core themes in her works. She is a self-taught artist who gained all her knowledge during the practice, additionally educated in Italy and Belgium. She actively sells her artwork for the US and European collectors. Her oversized acrylic canvases, giclee prints, and geometric drawings are found in private homes and corporate collections worldwide. Her artworks are exhibited in several trendy spaces around Tbilisi too! and of course, now Santa Fe!
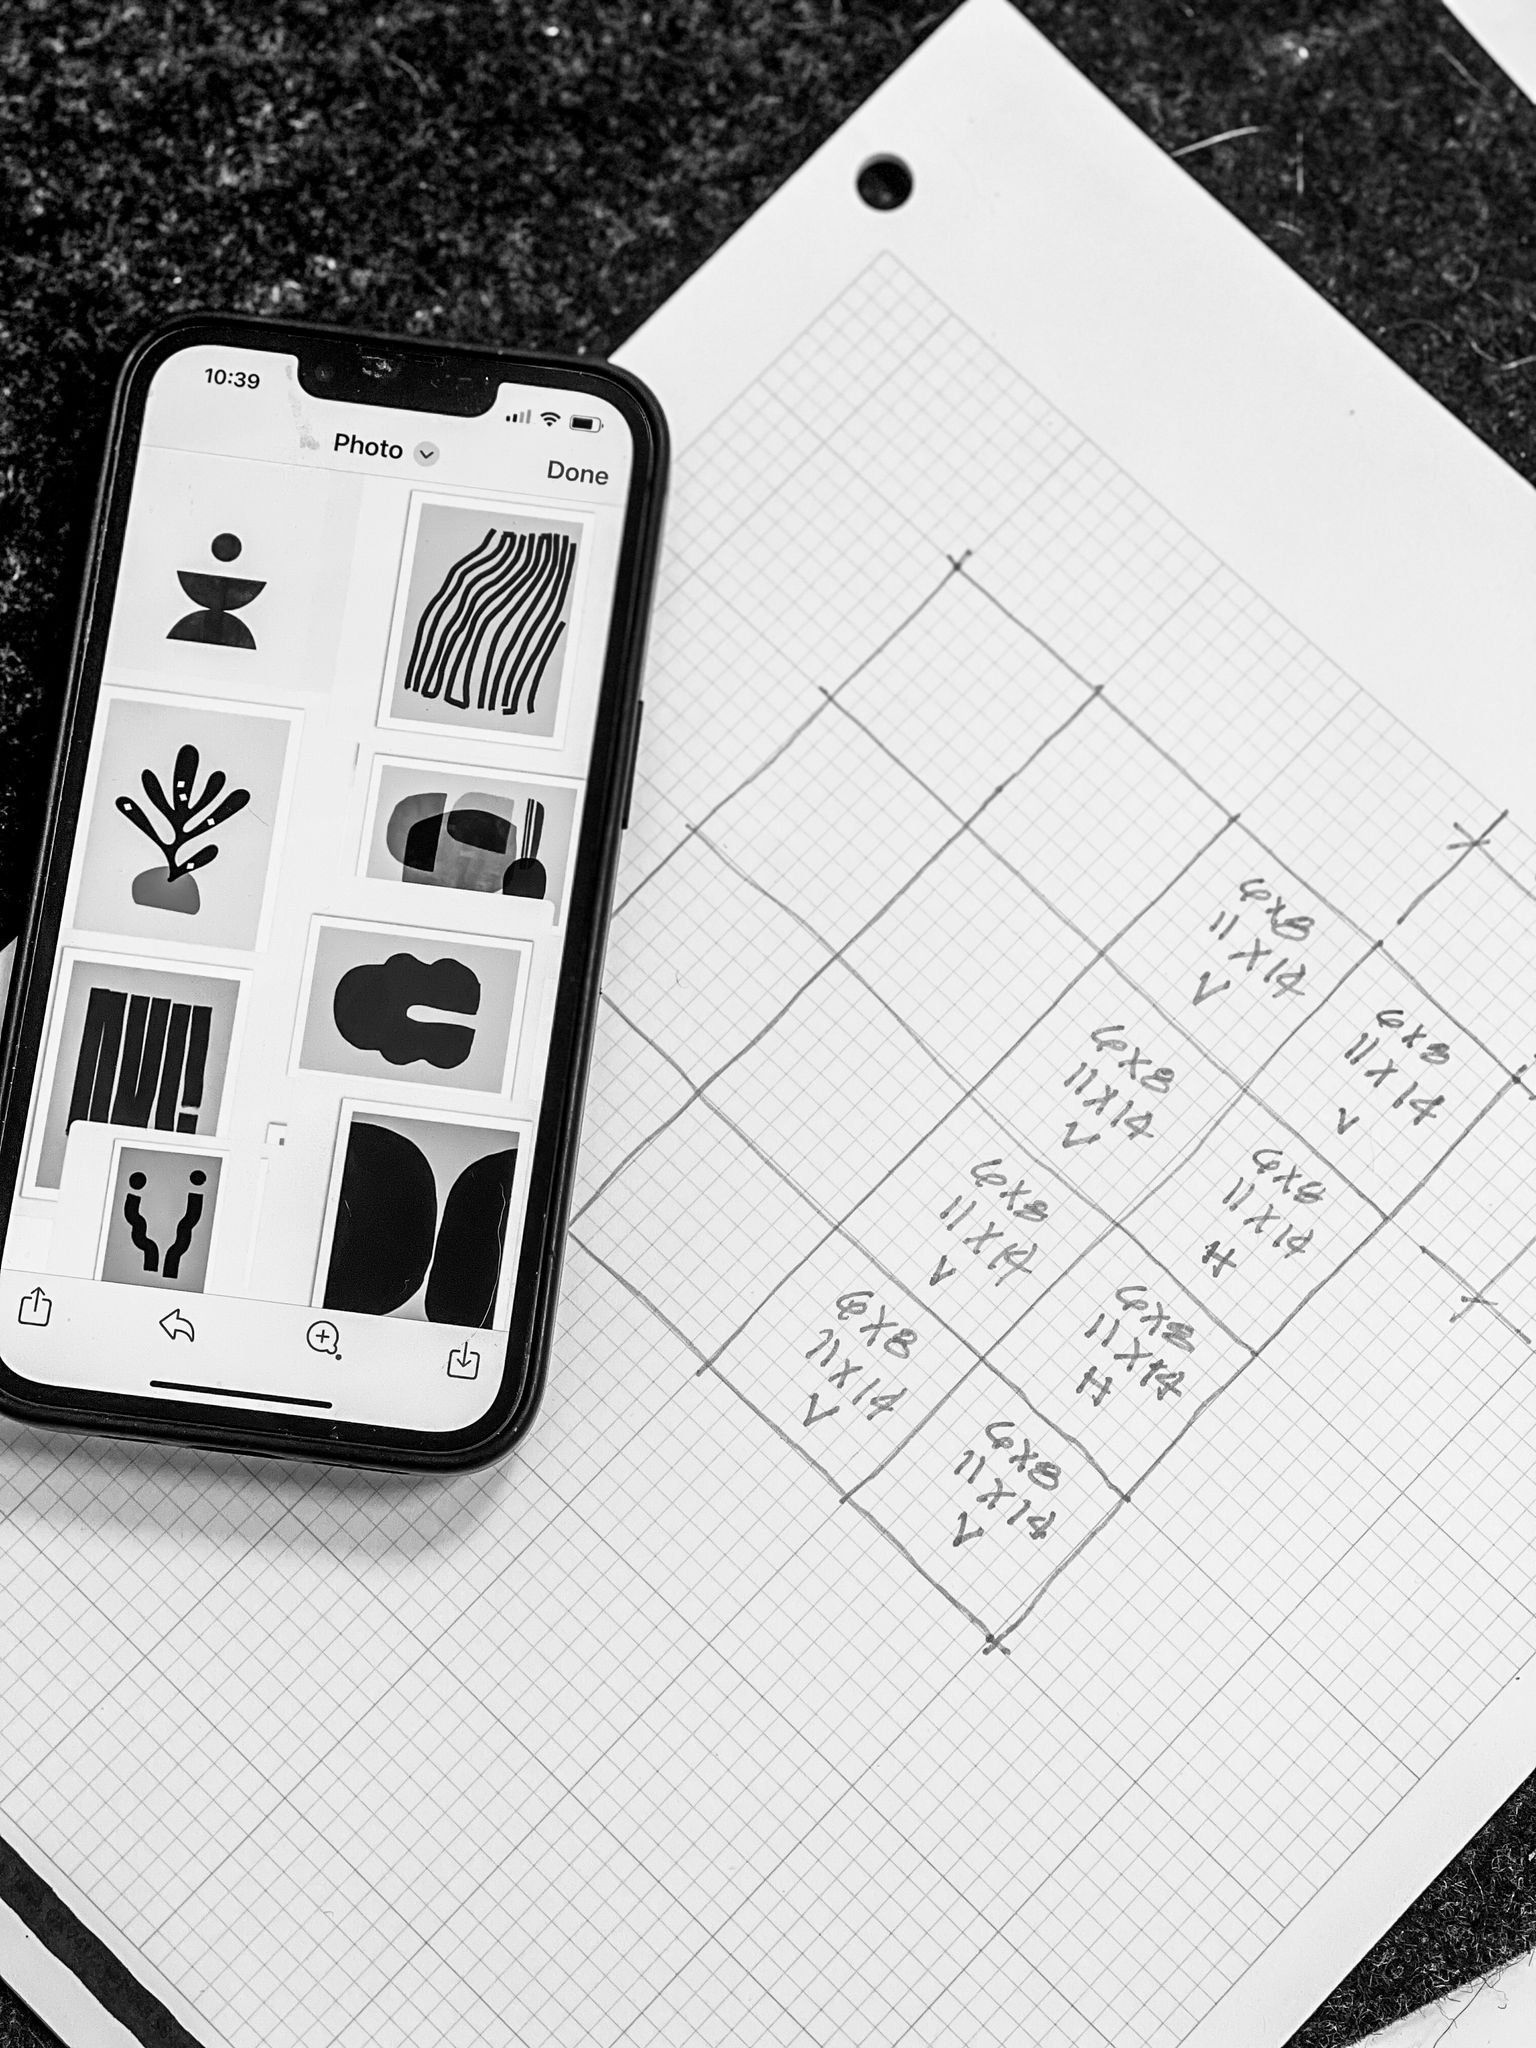
The 9 pieces we choose of Anna’s from FY! are:
Stripes Vessel In Red Art Print
Abstract Red Composition Art Print
Abstract Black Object 2 Art Print
Abstract Brown Lines Art Print
Abstract Composition In Black And Beige Art Print
Abstract Black Lines 04 Art Print
Abstract Red Lines 1 Art Print
Abstract Black Object 4 Art Print
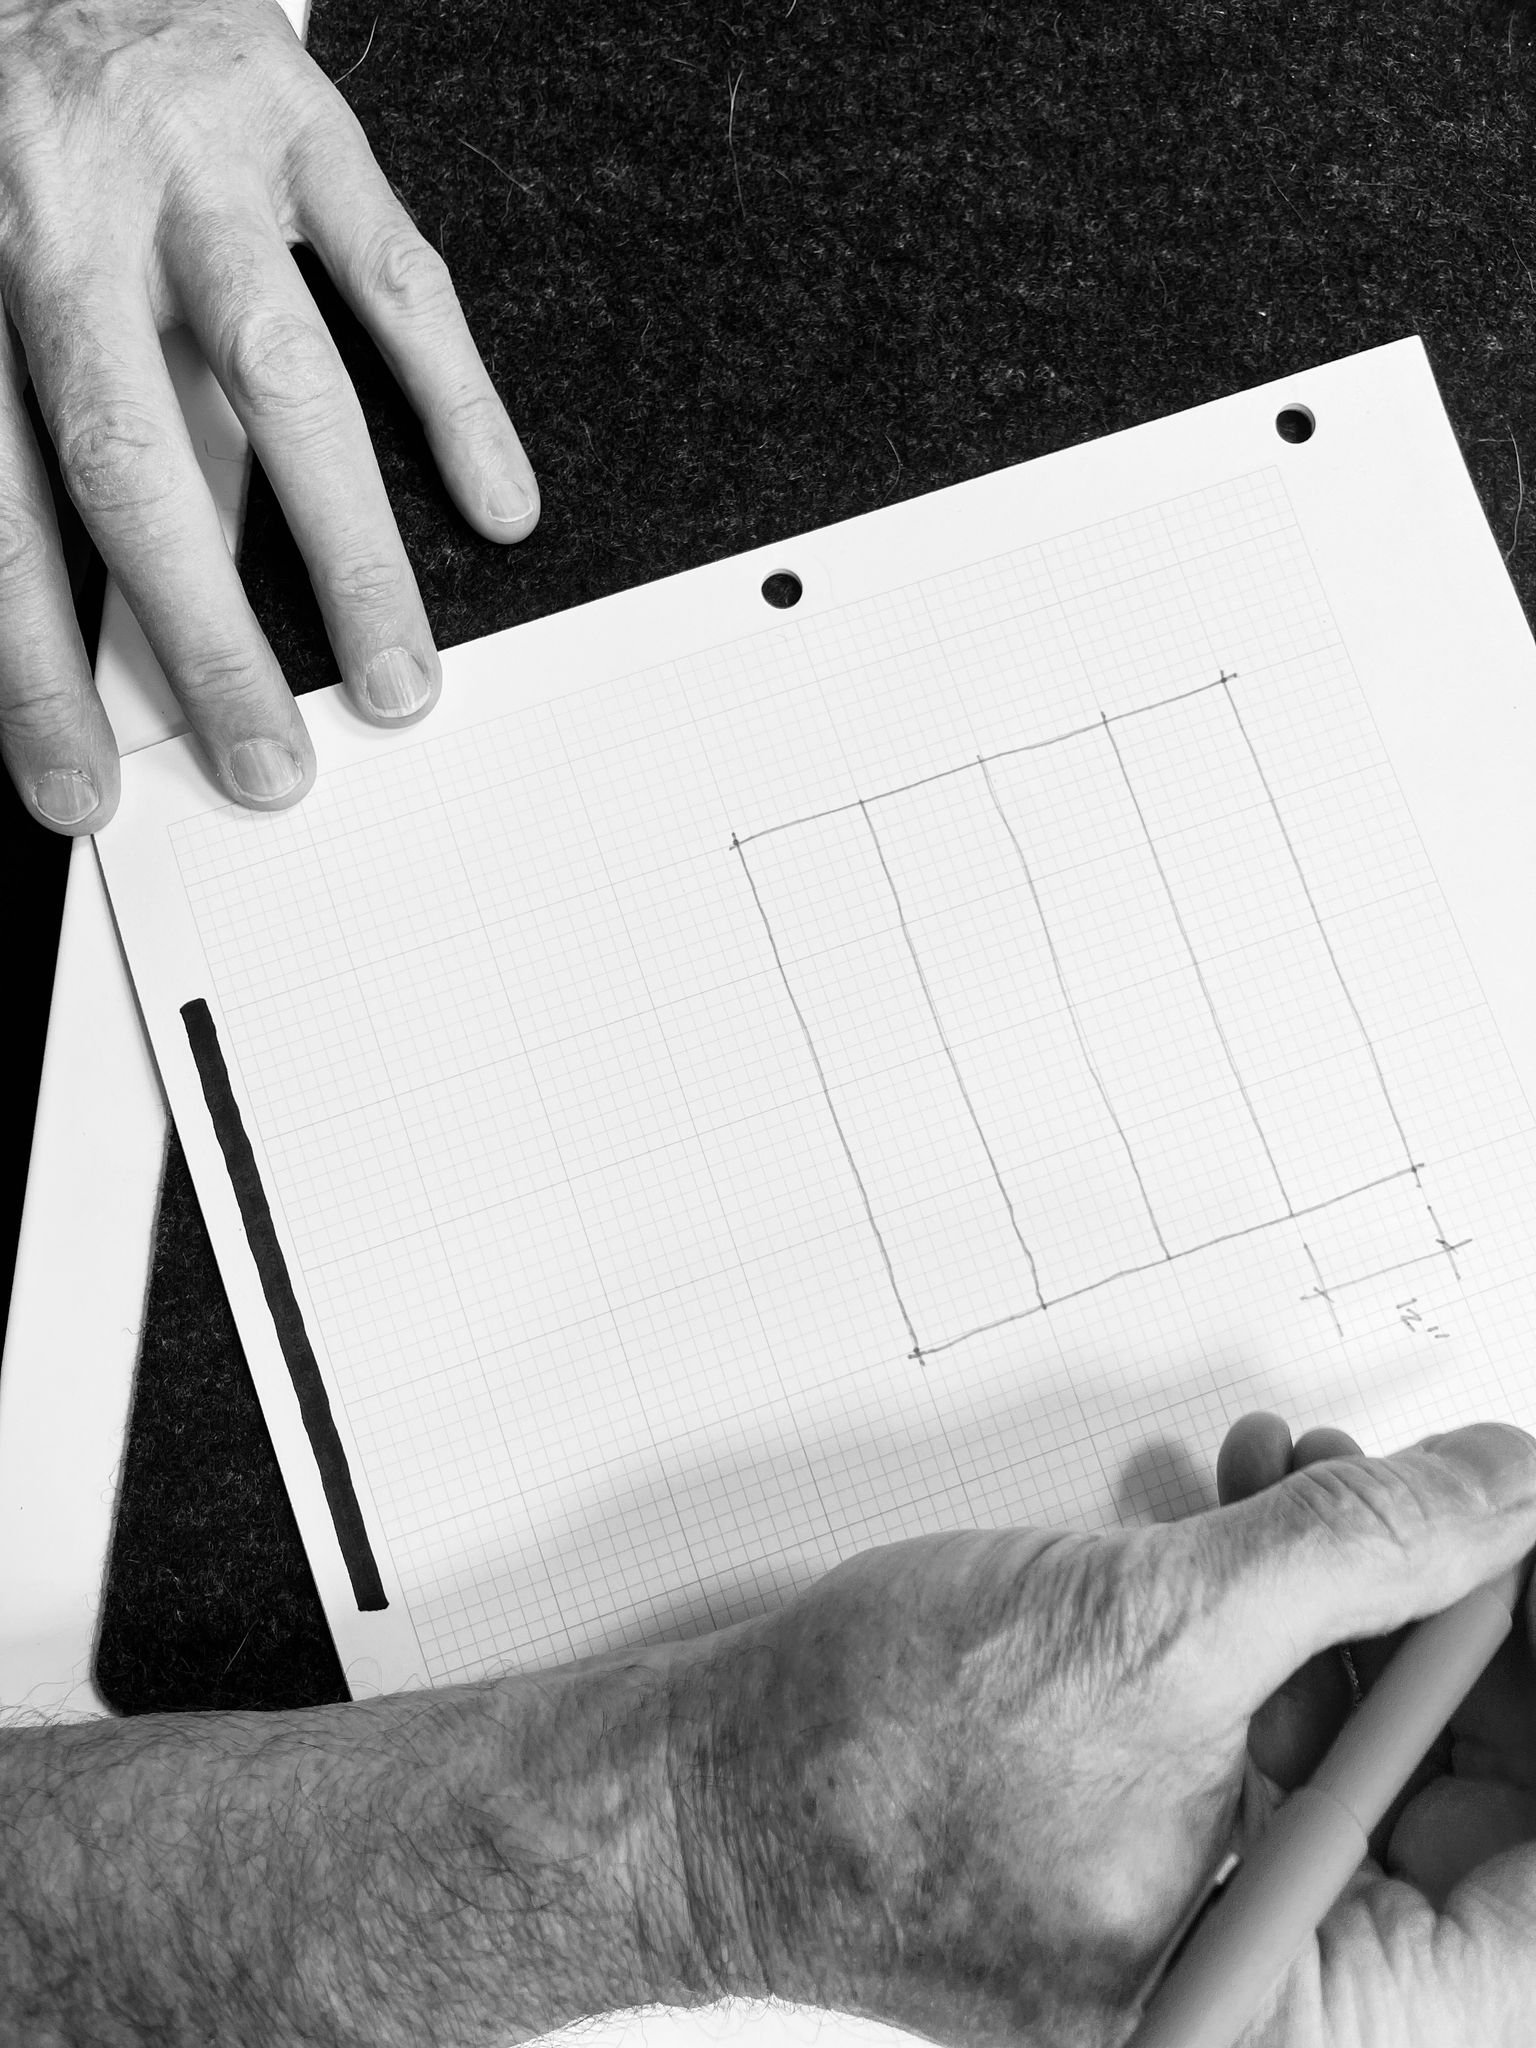
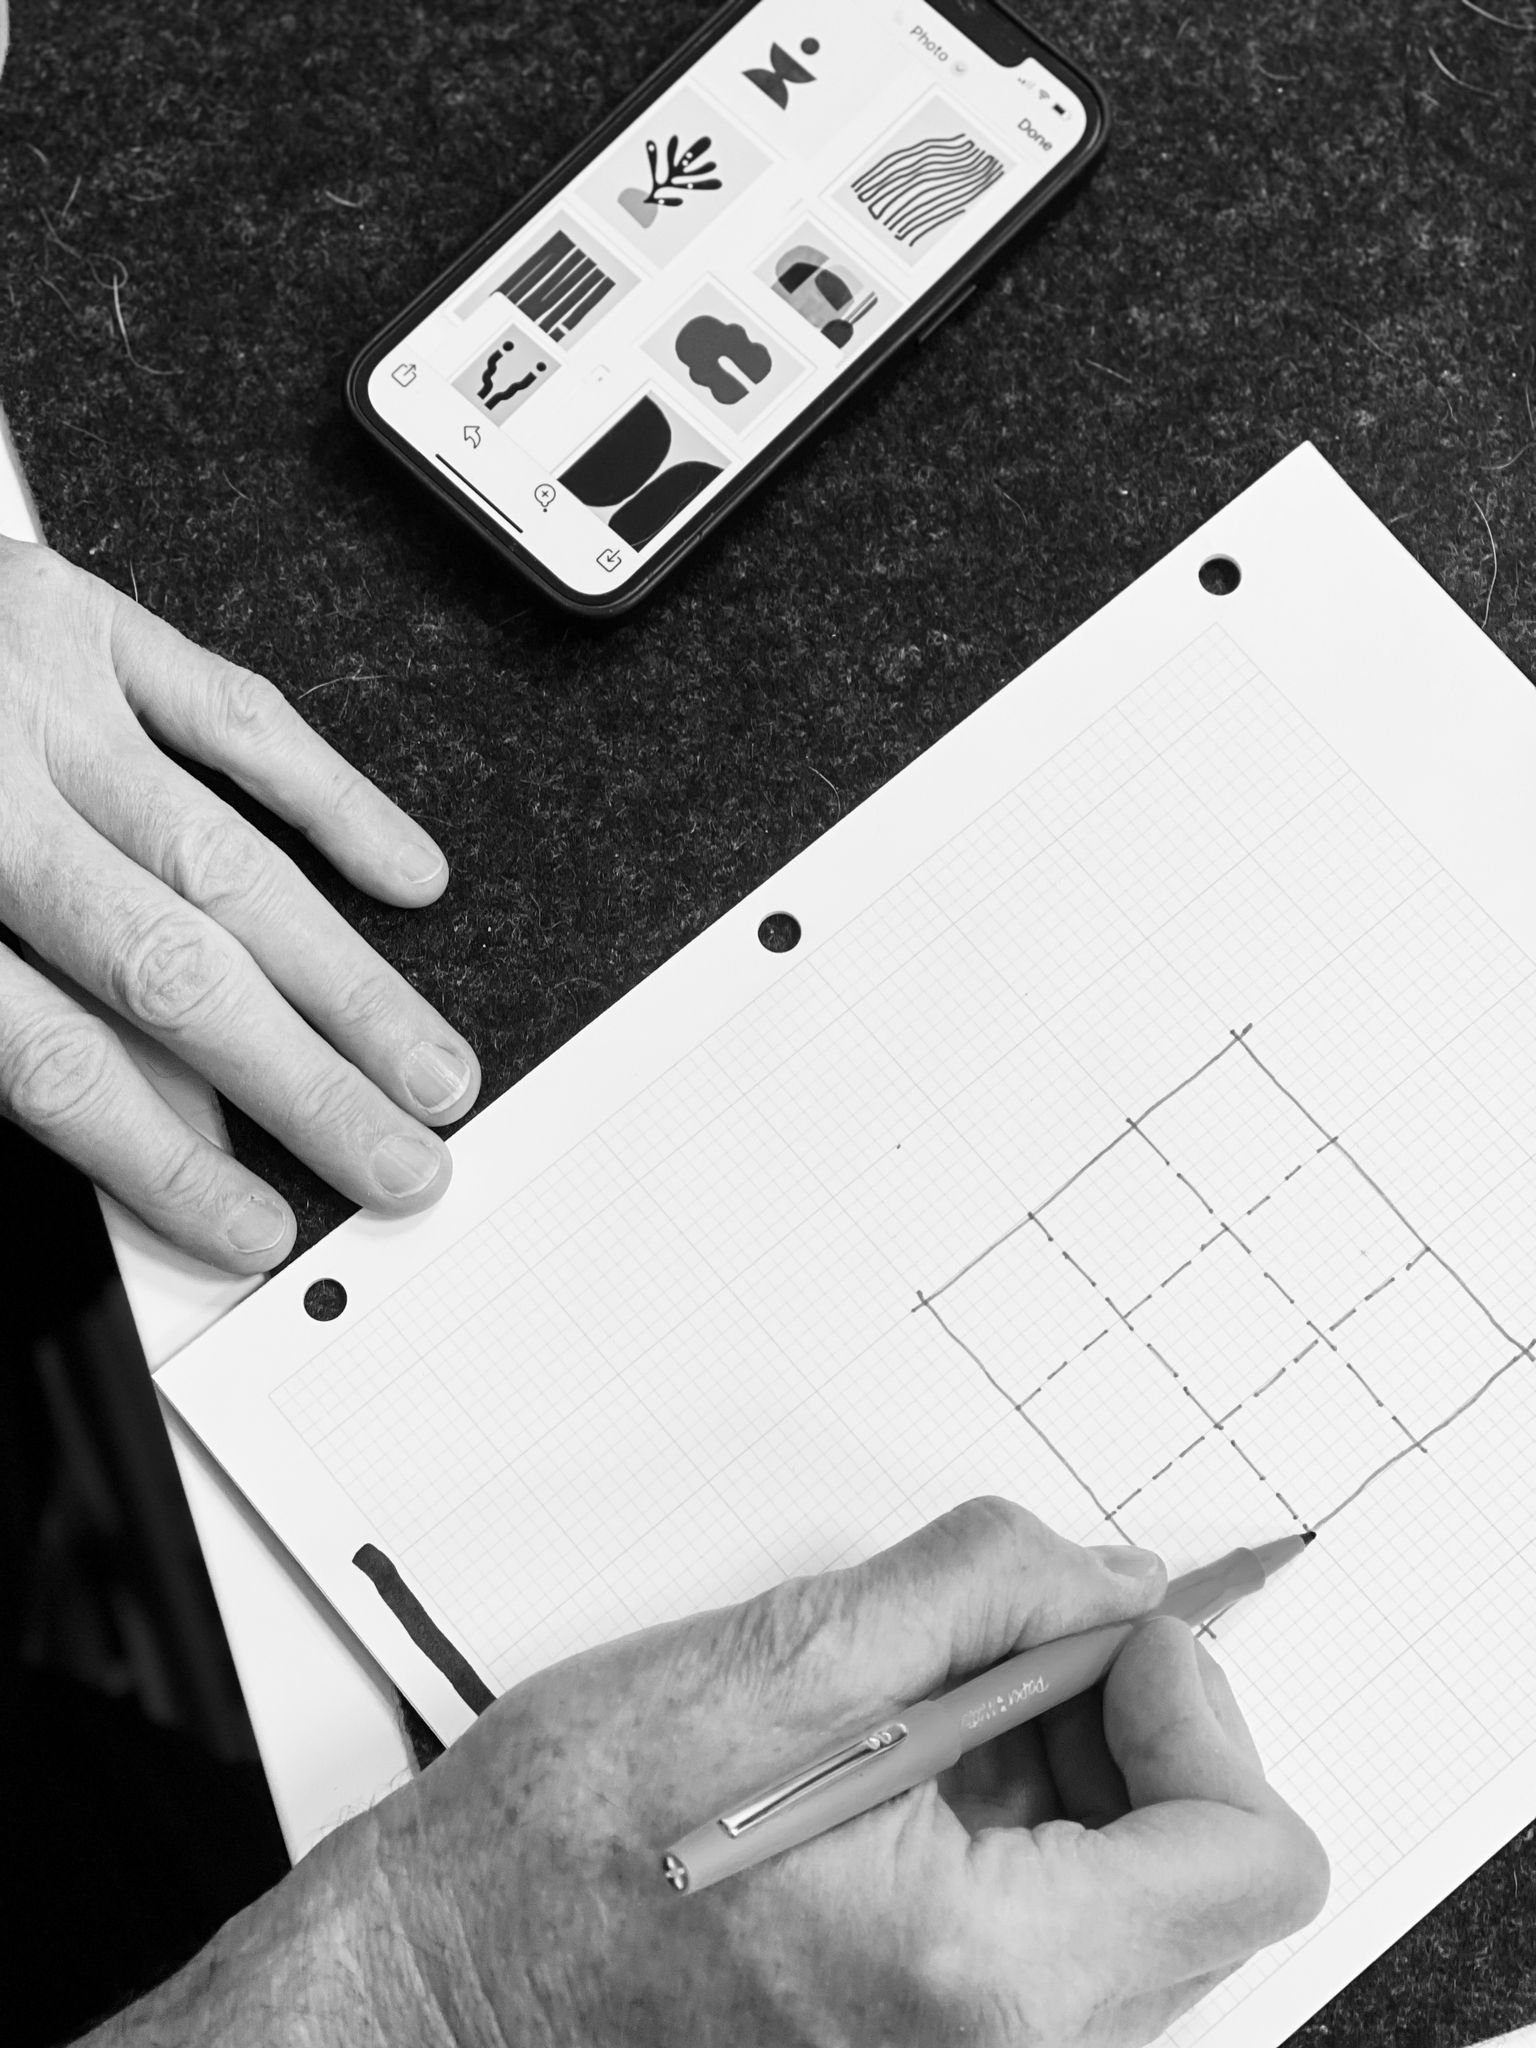
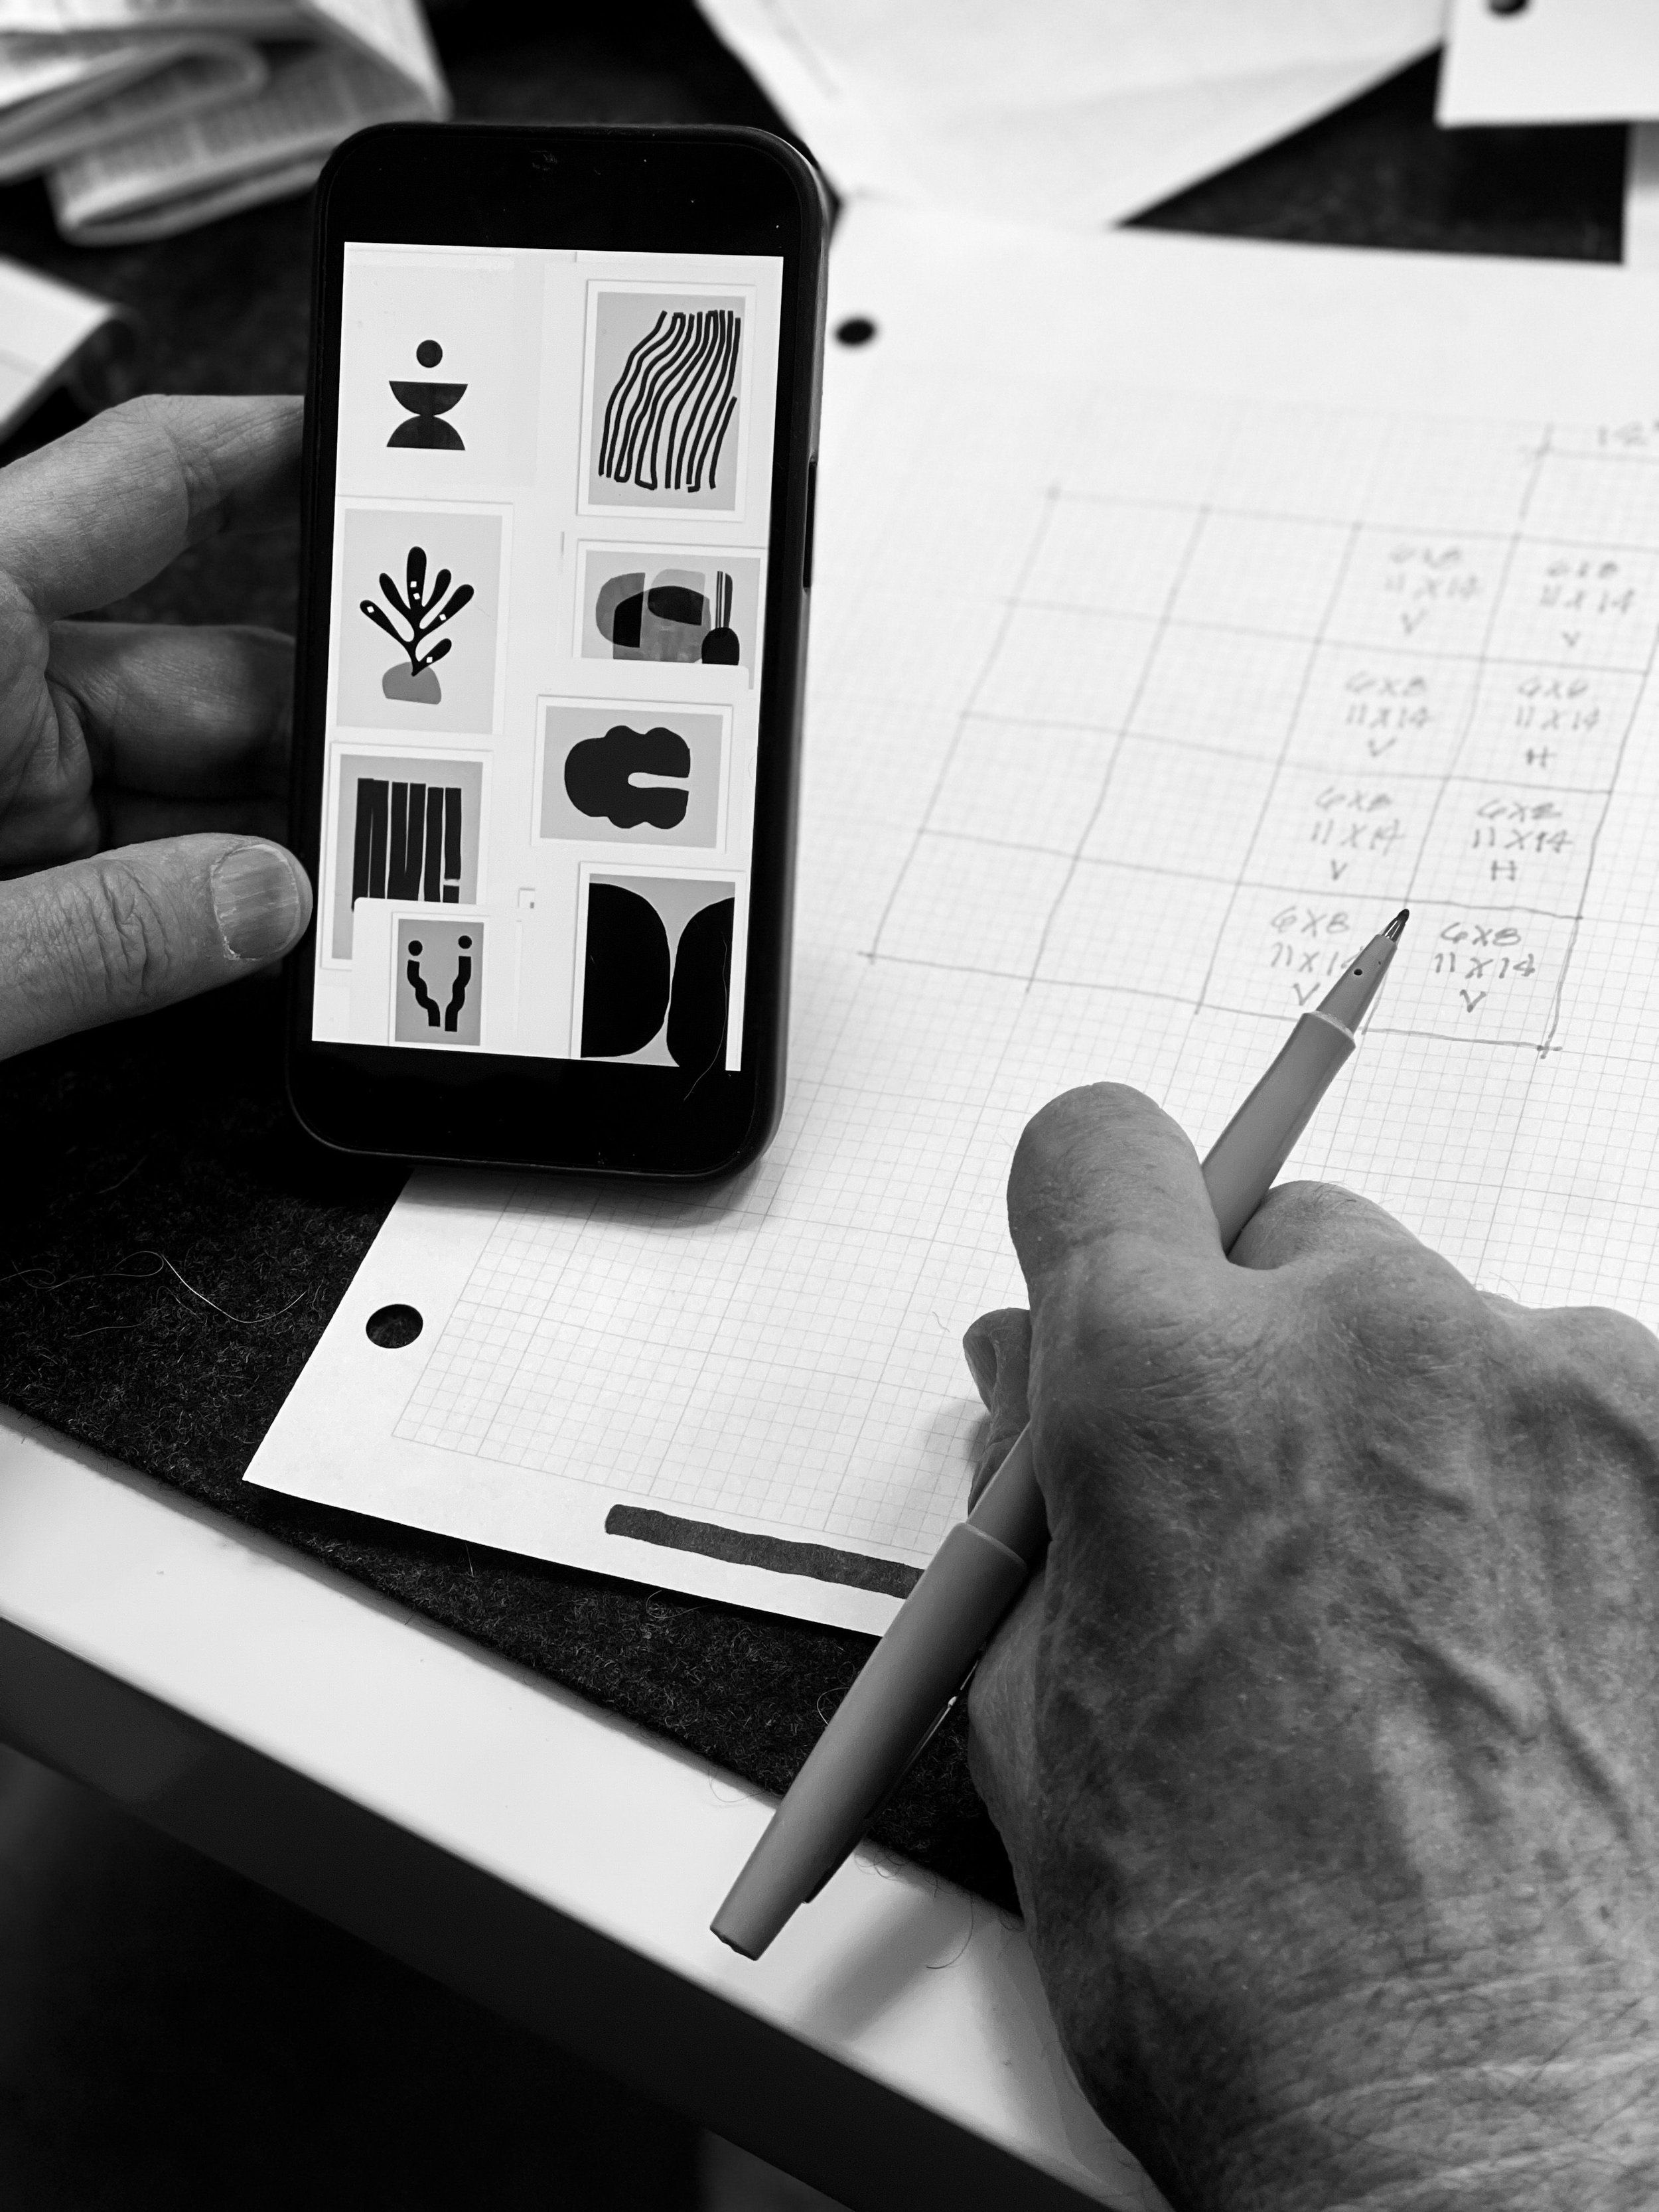
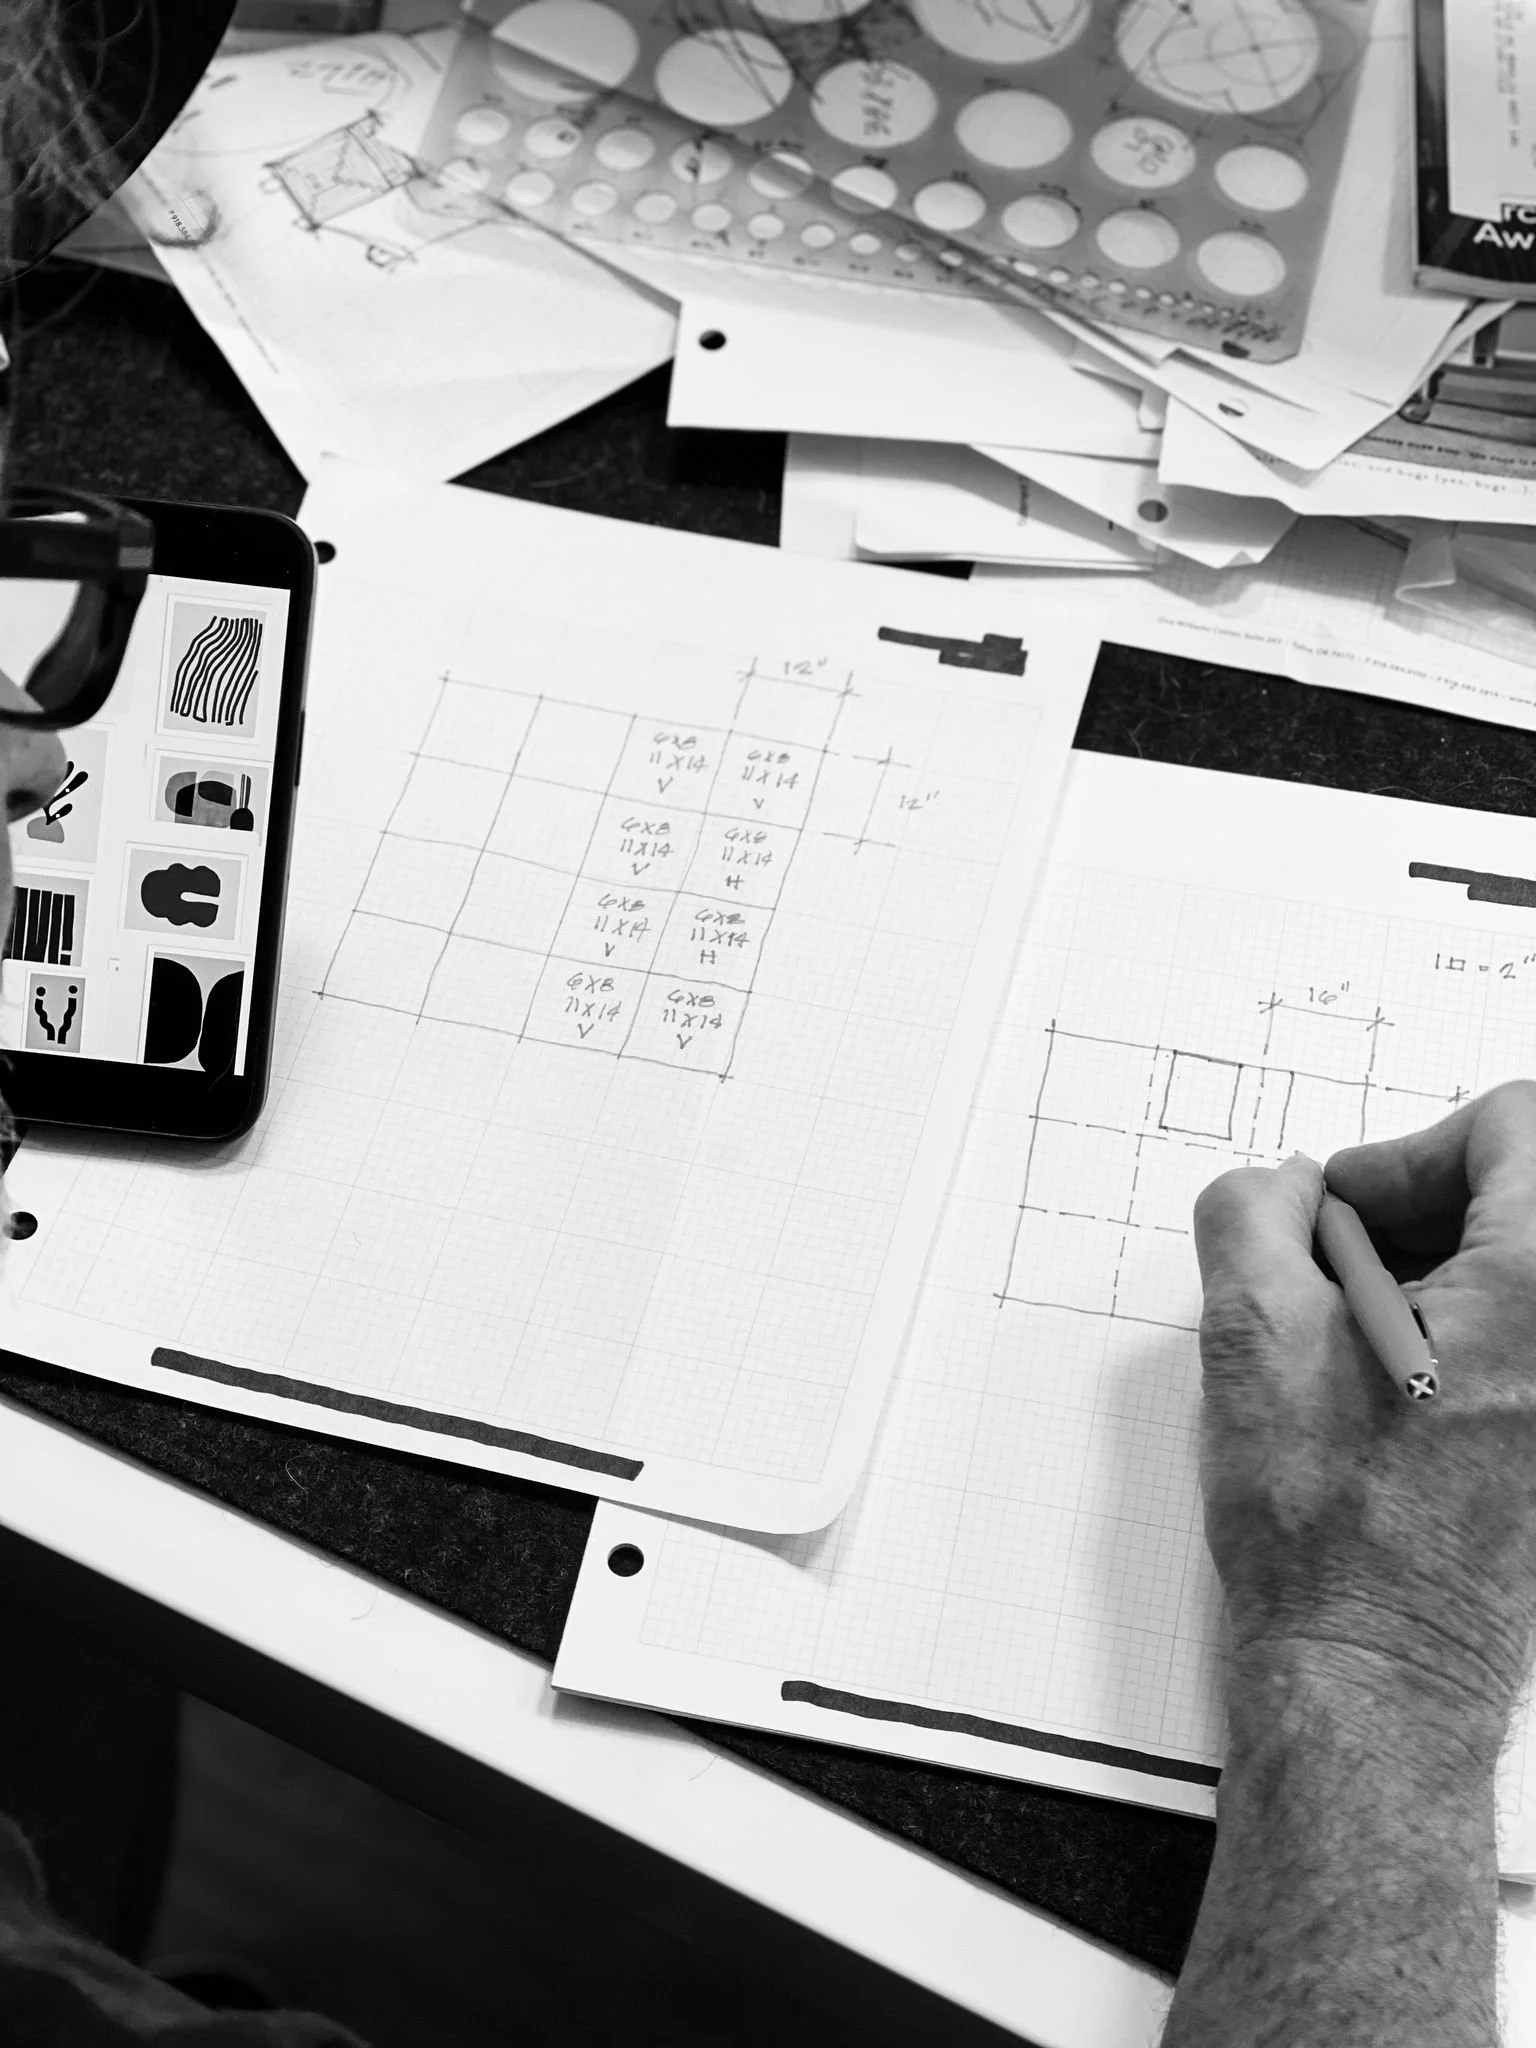
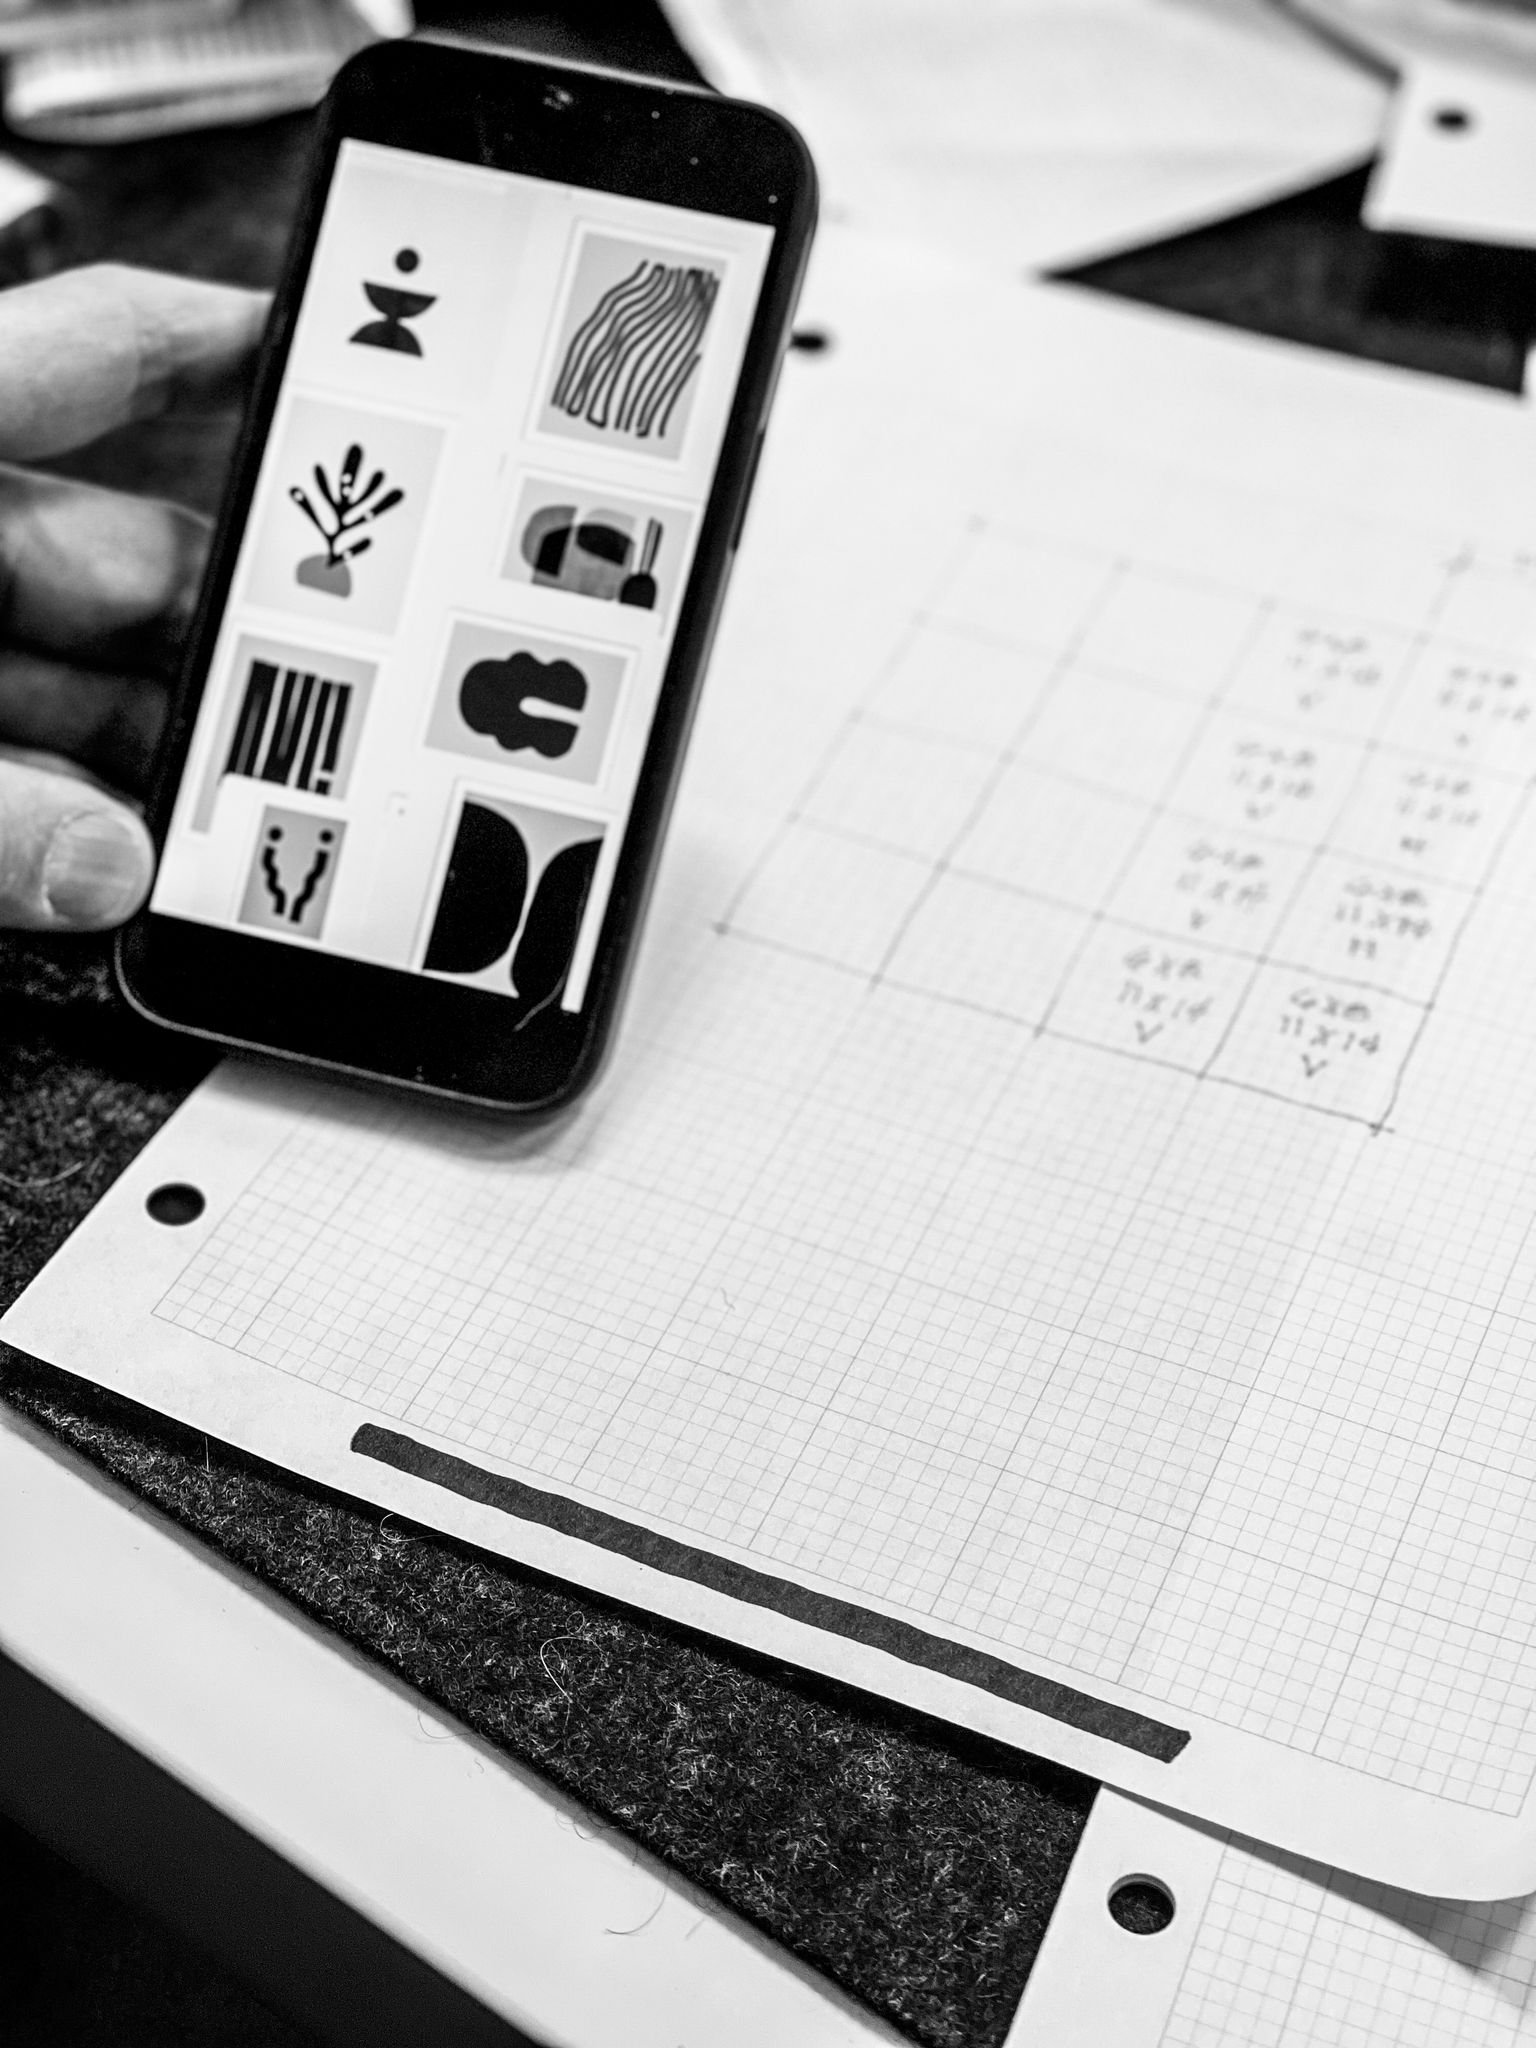
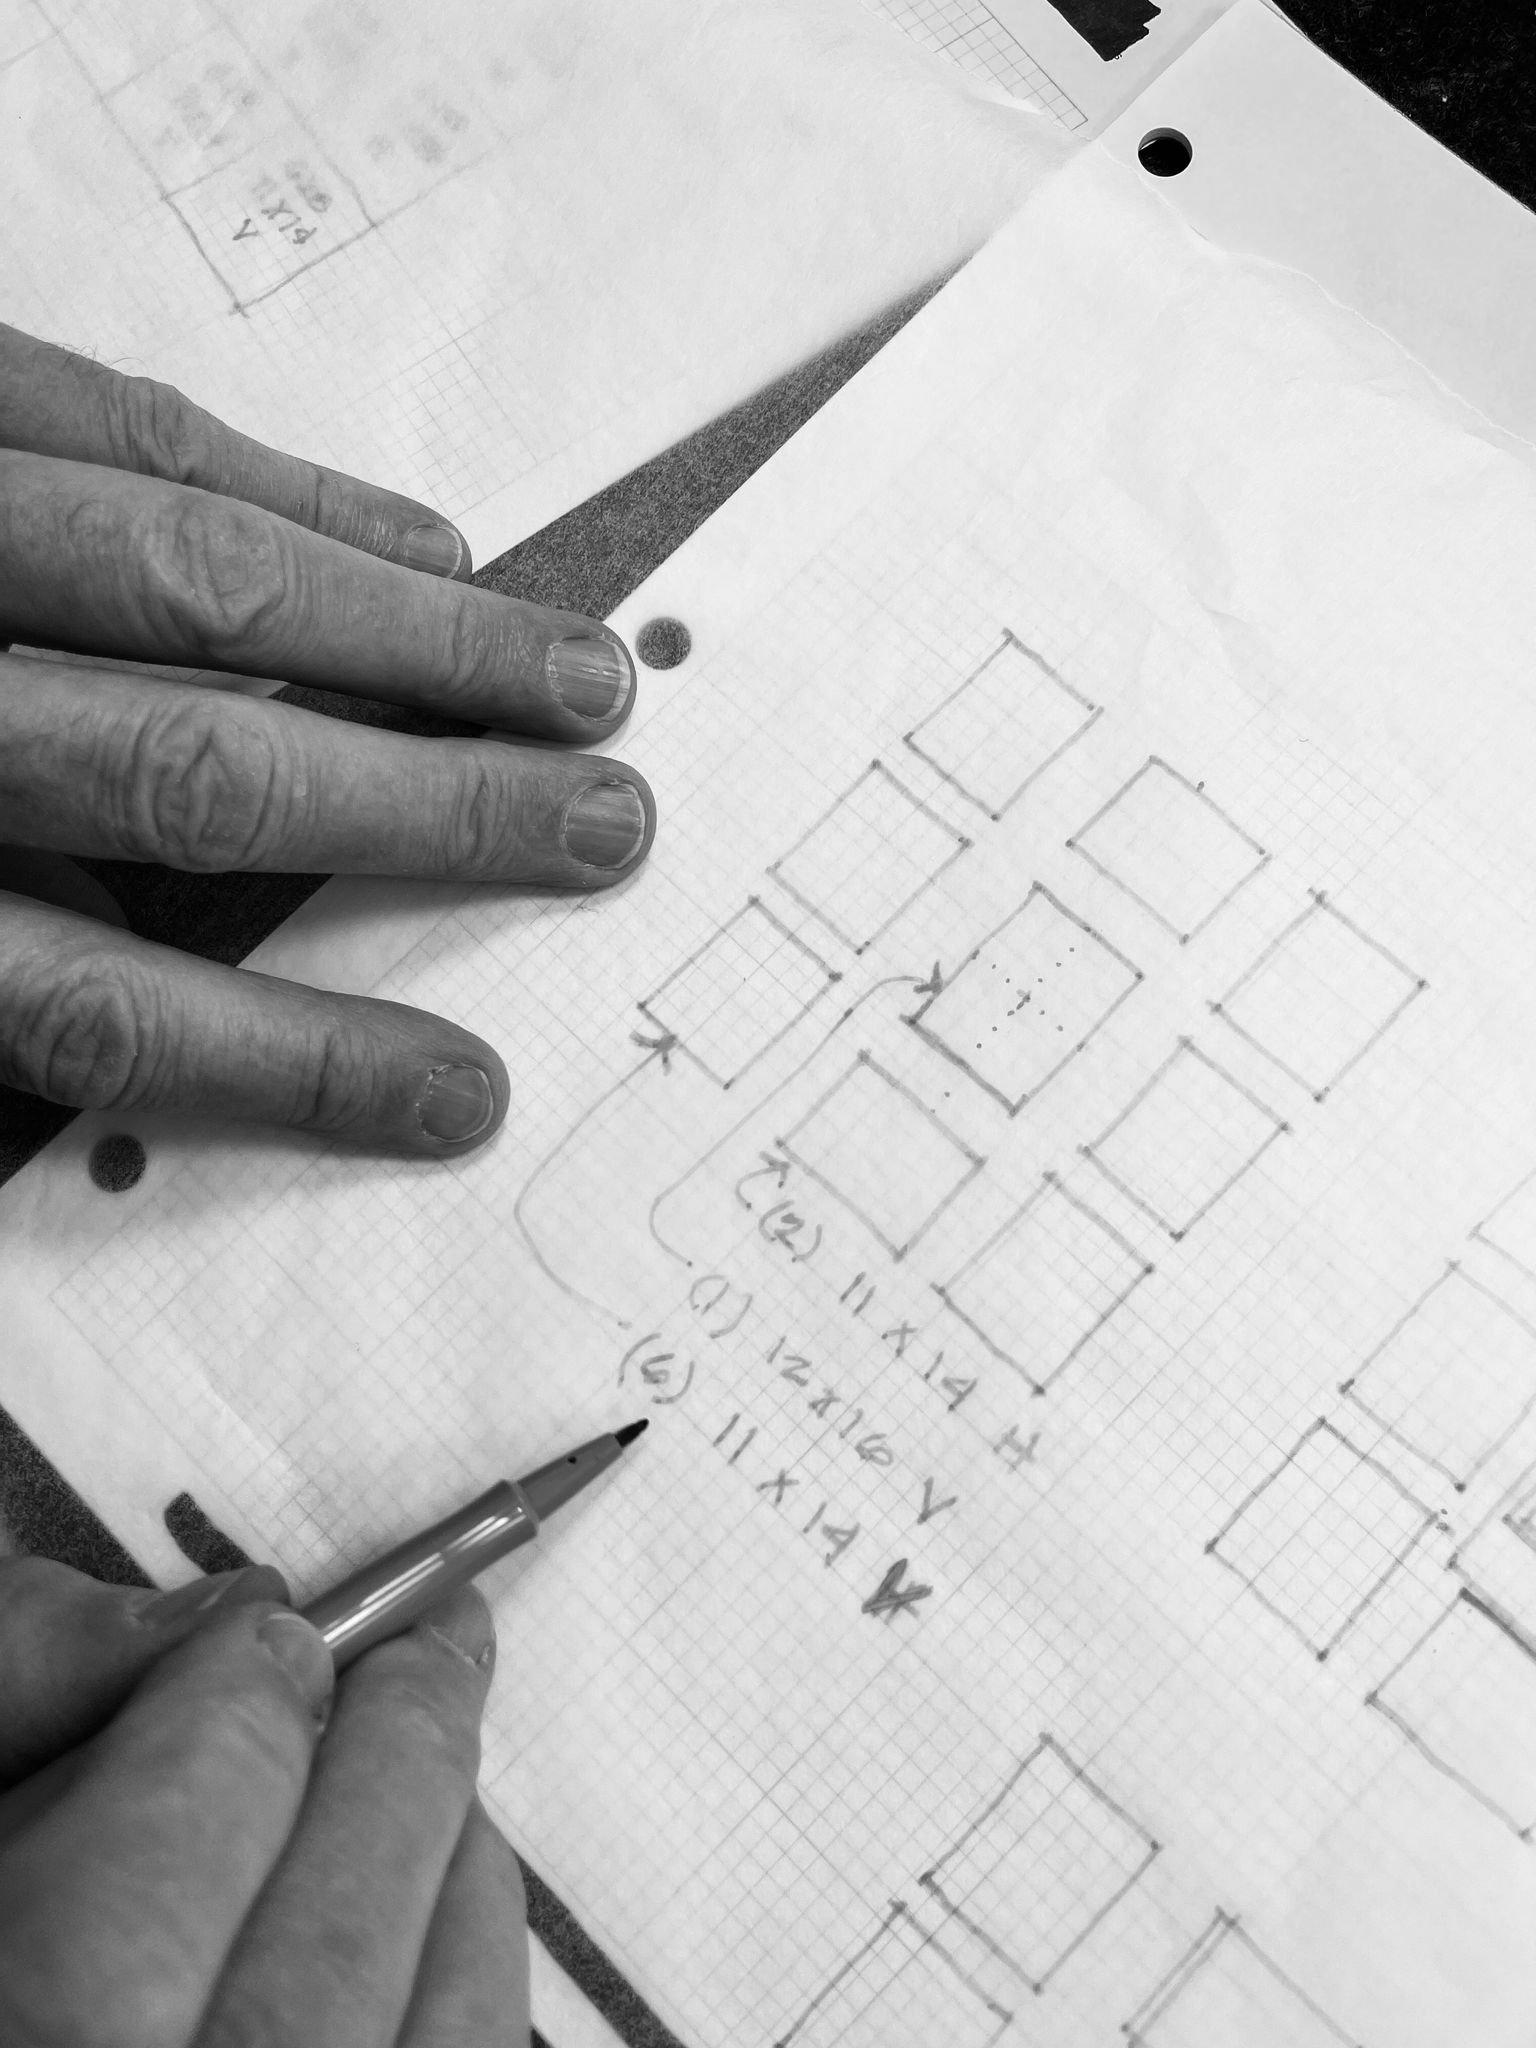
Measure.
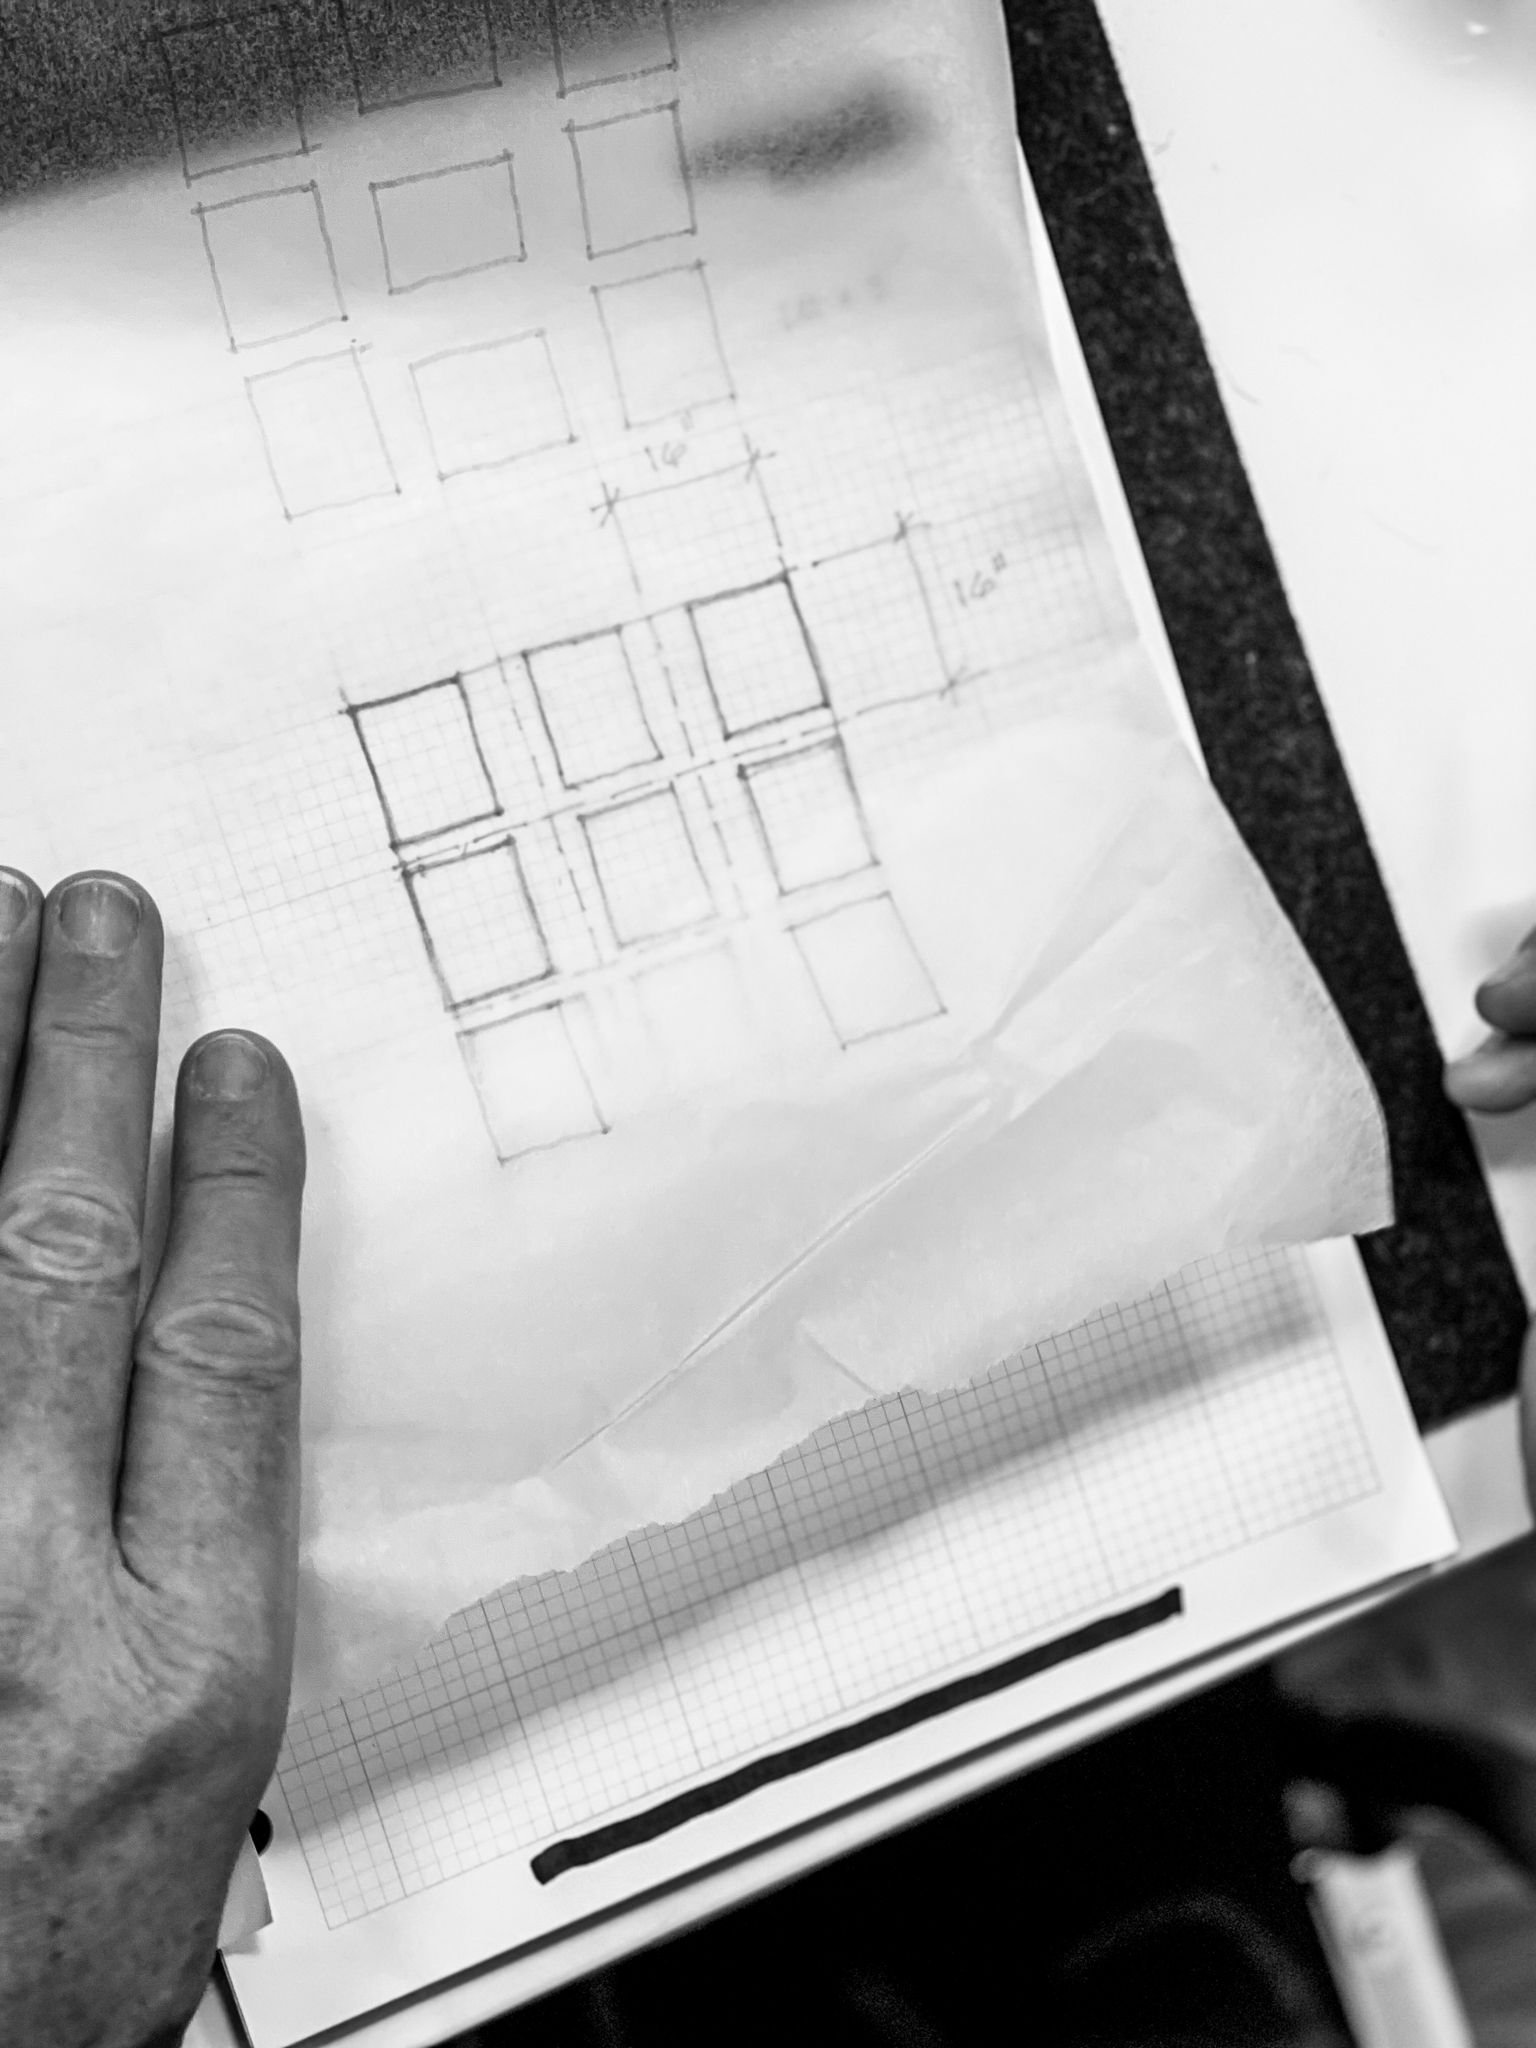
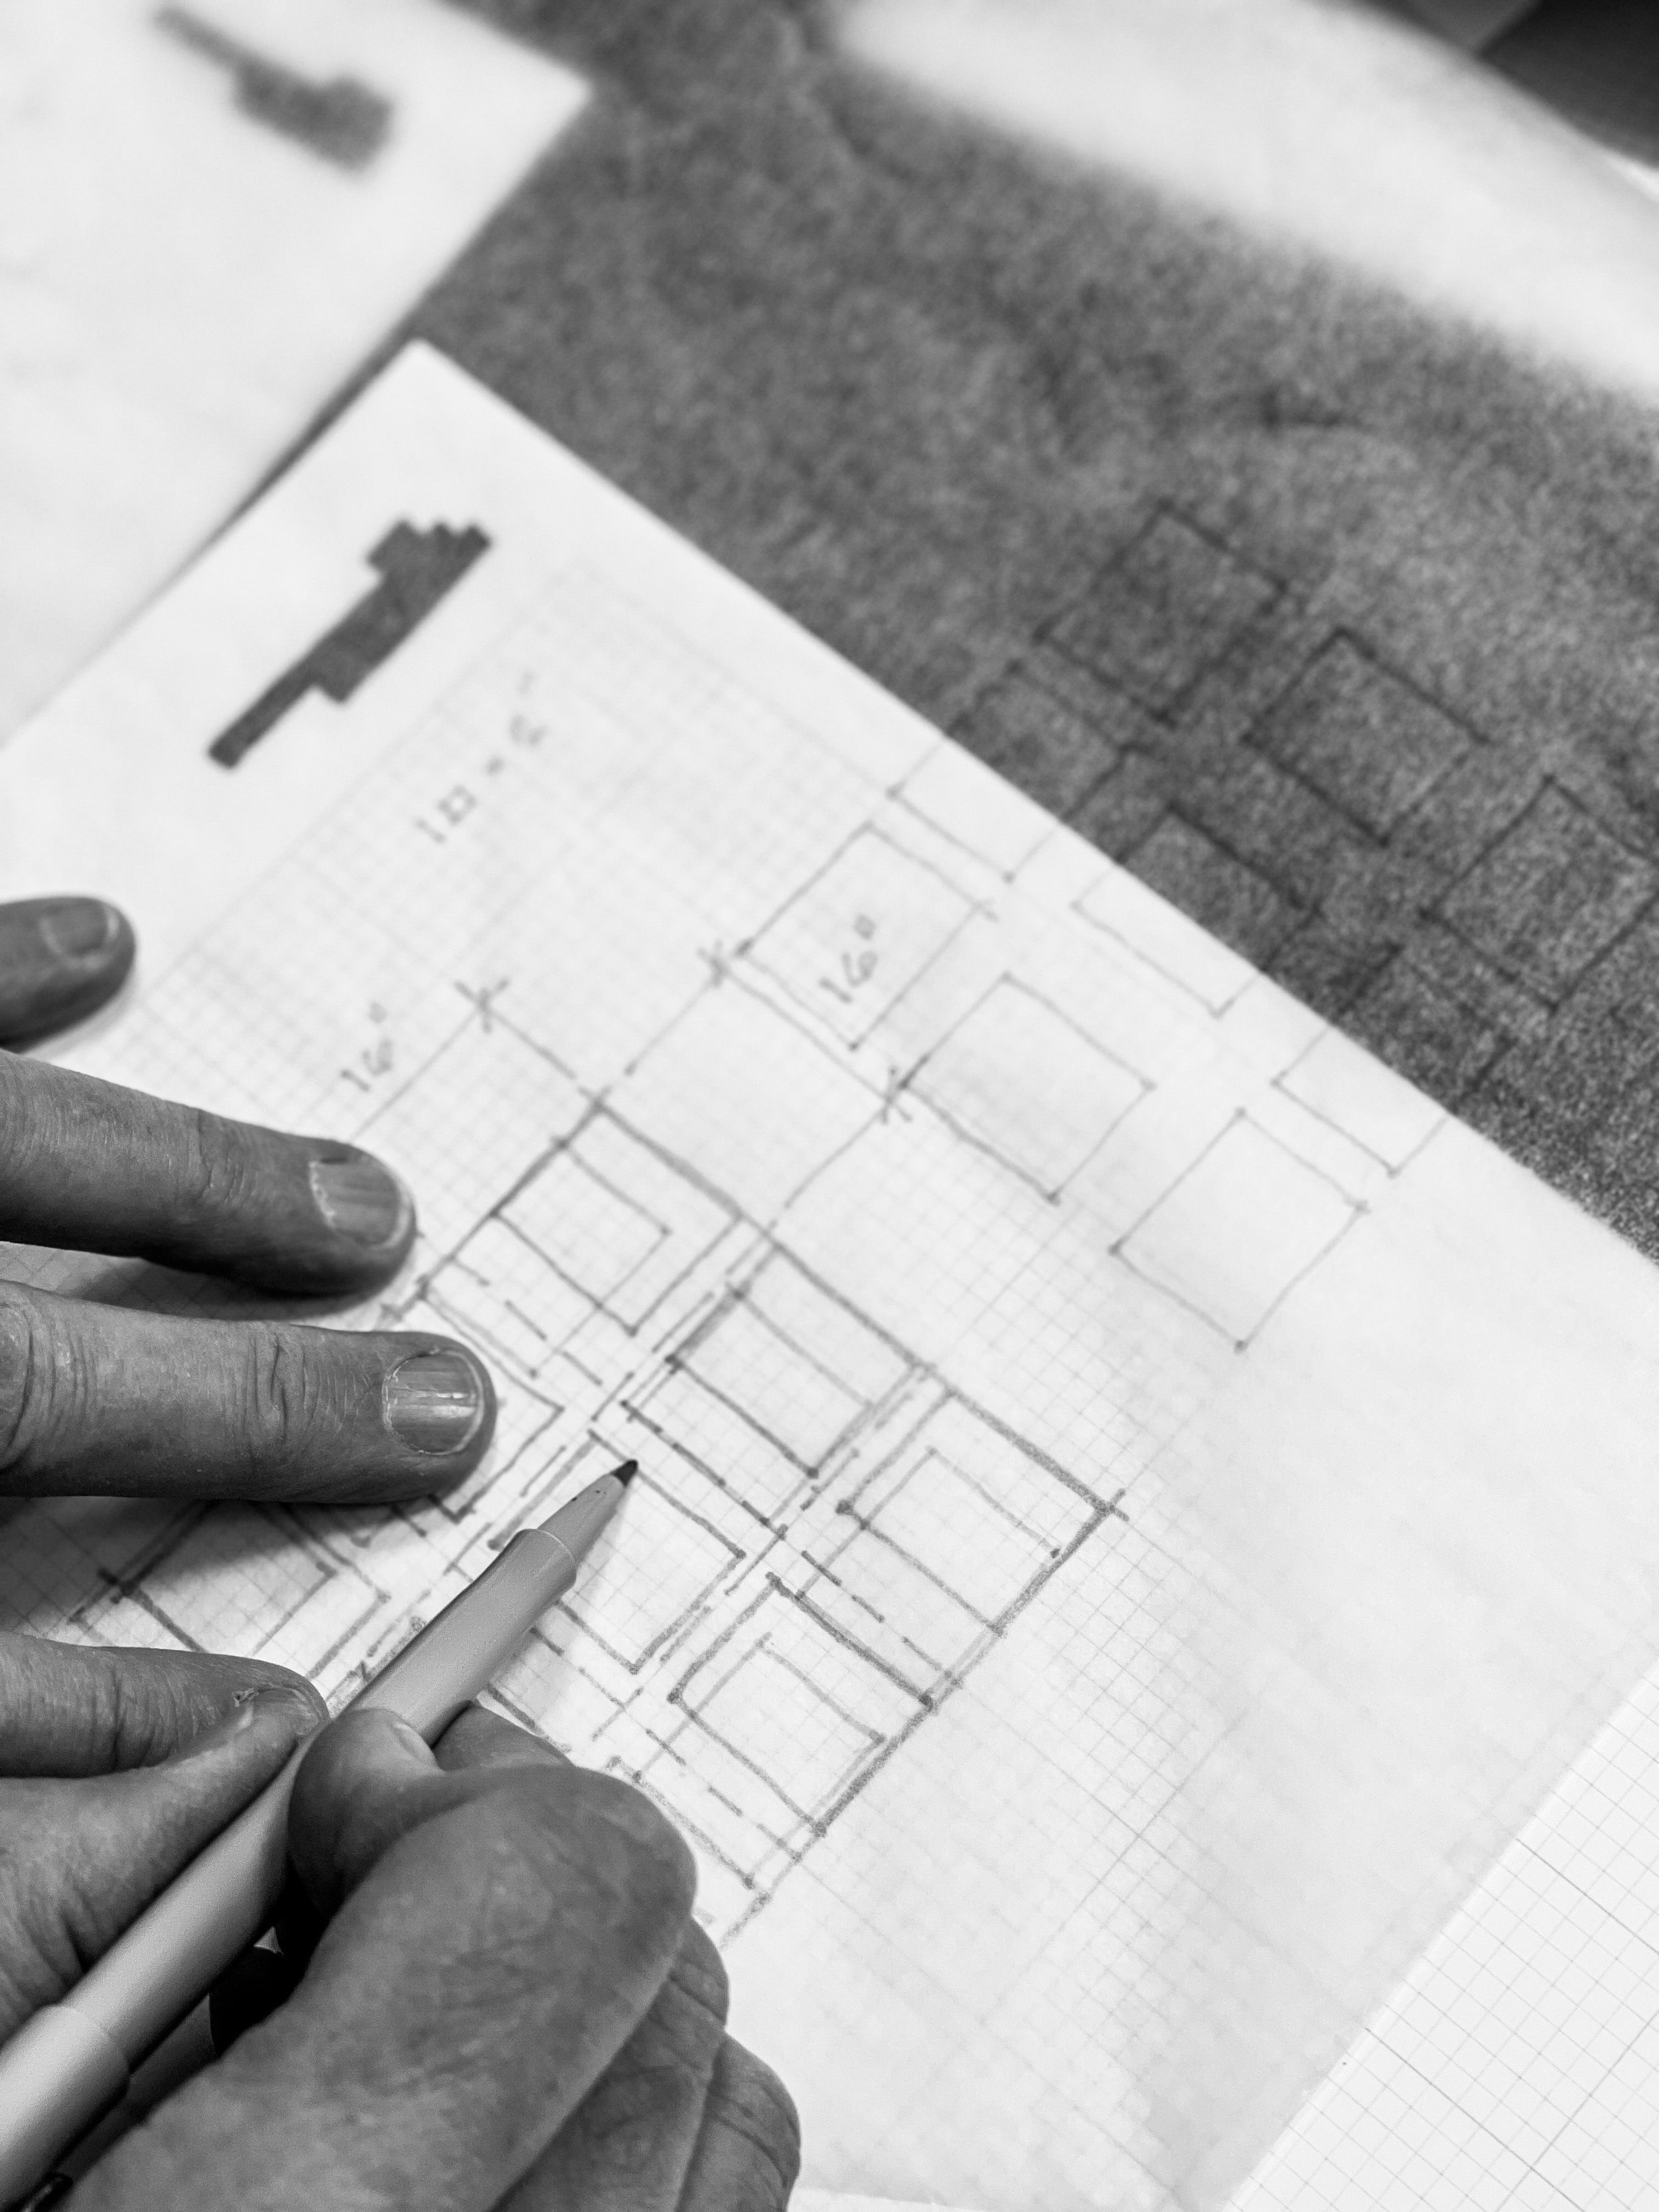
Dust off your arithmetic skills and grab a measuring tape! This math may look intimidating, but it’s simple. ….
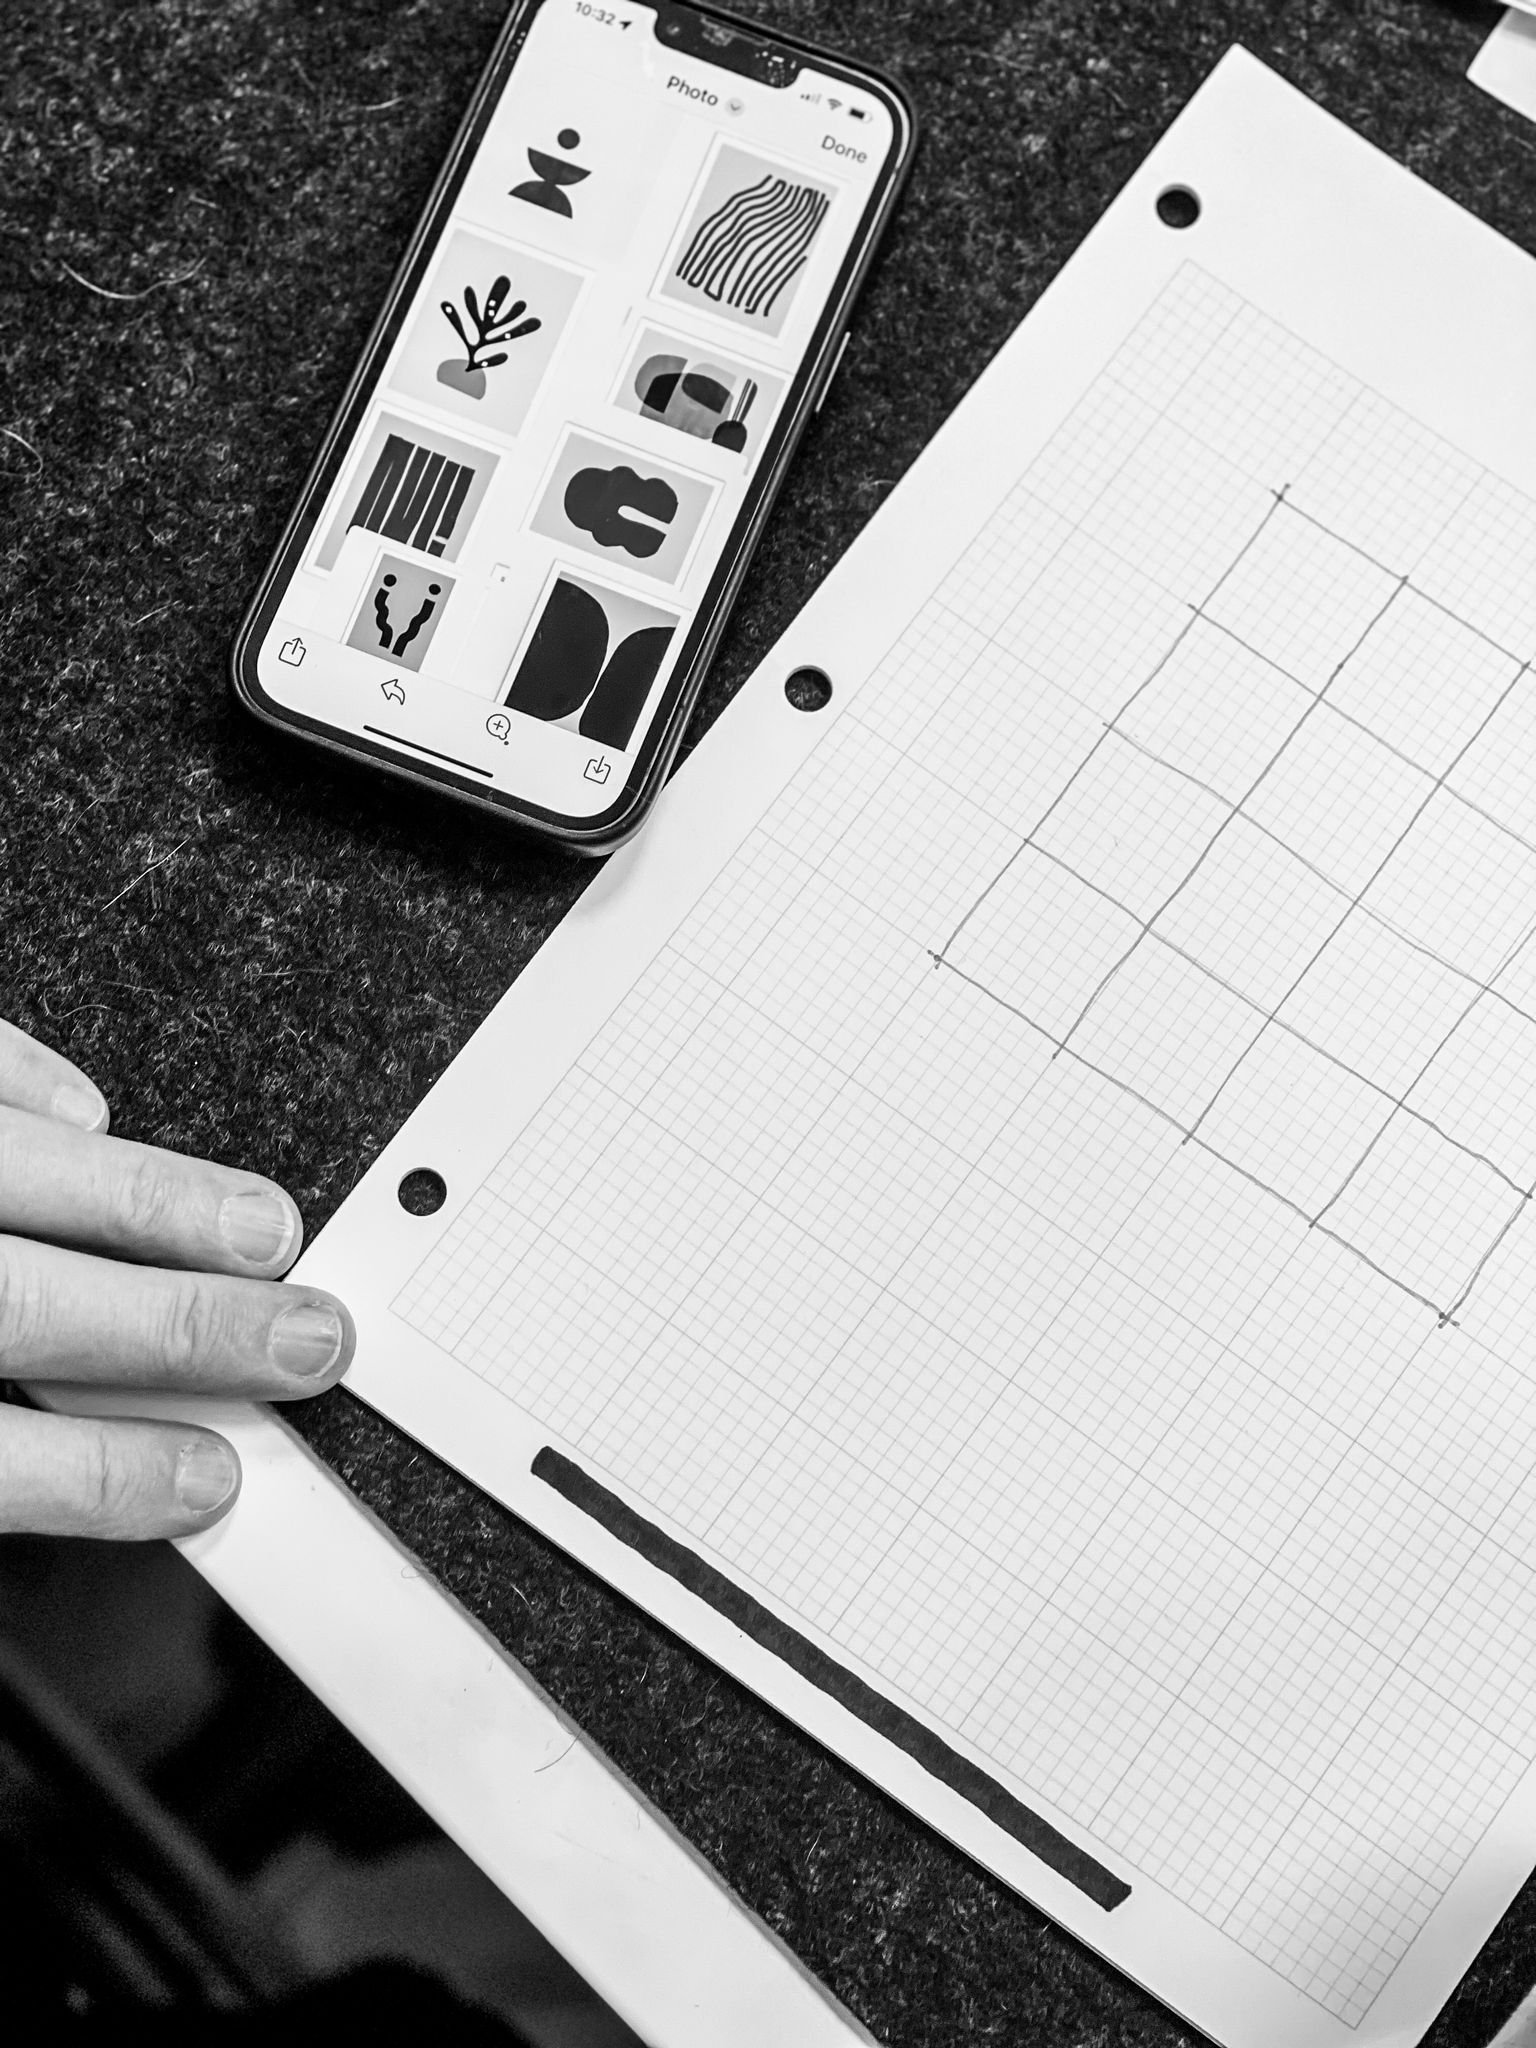
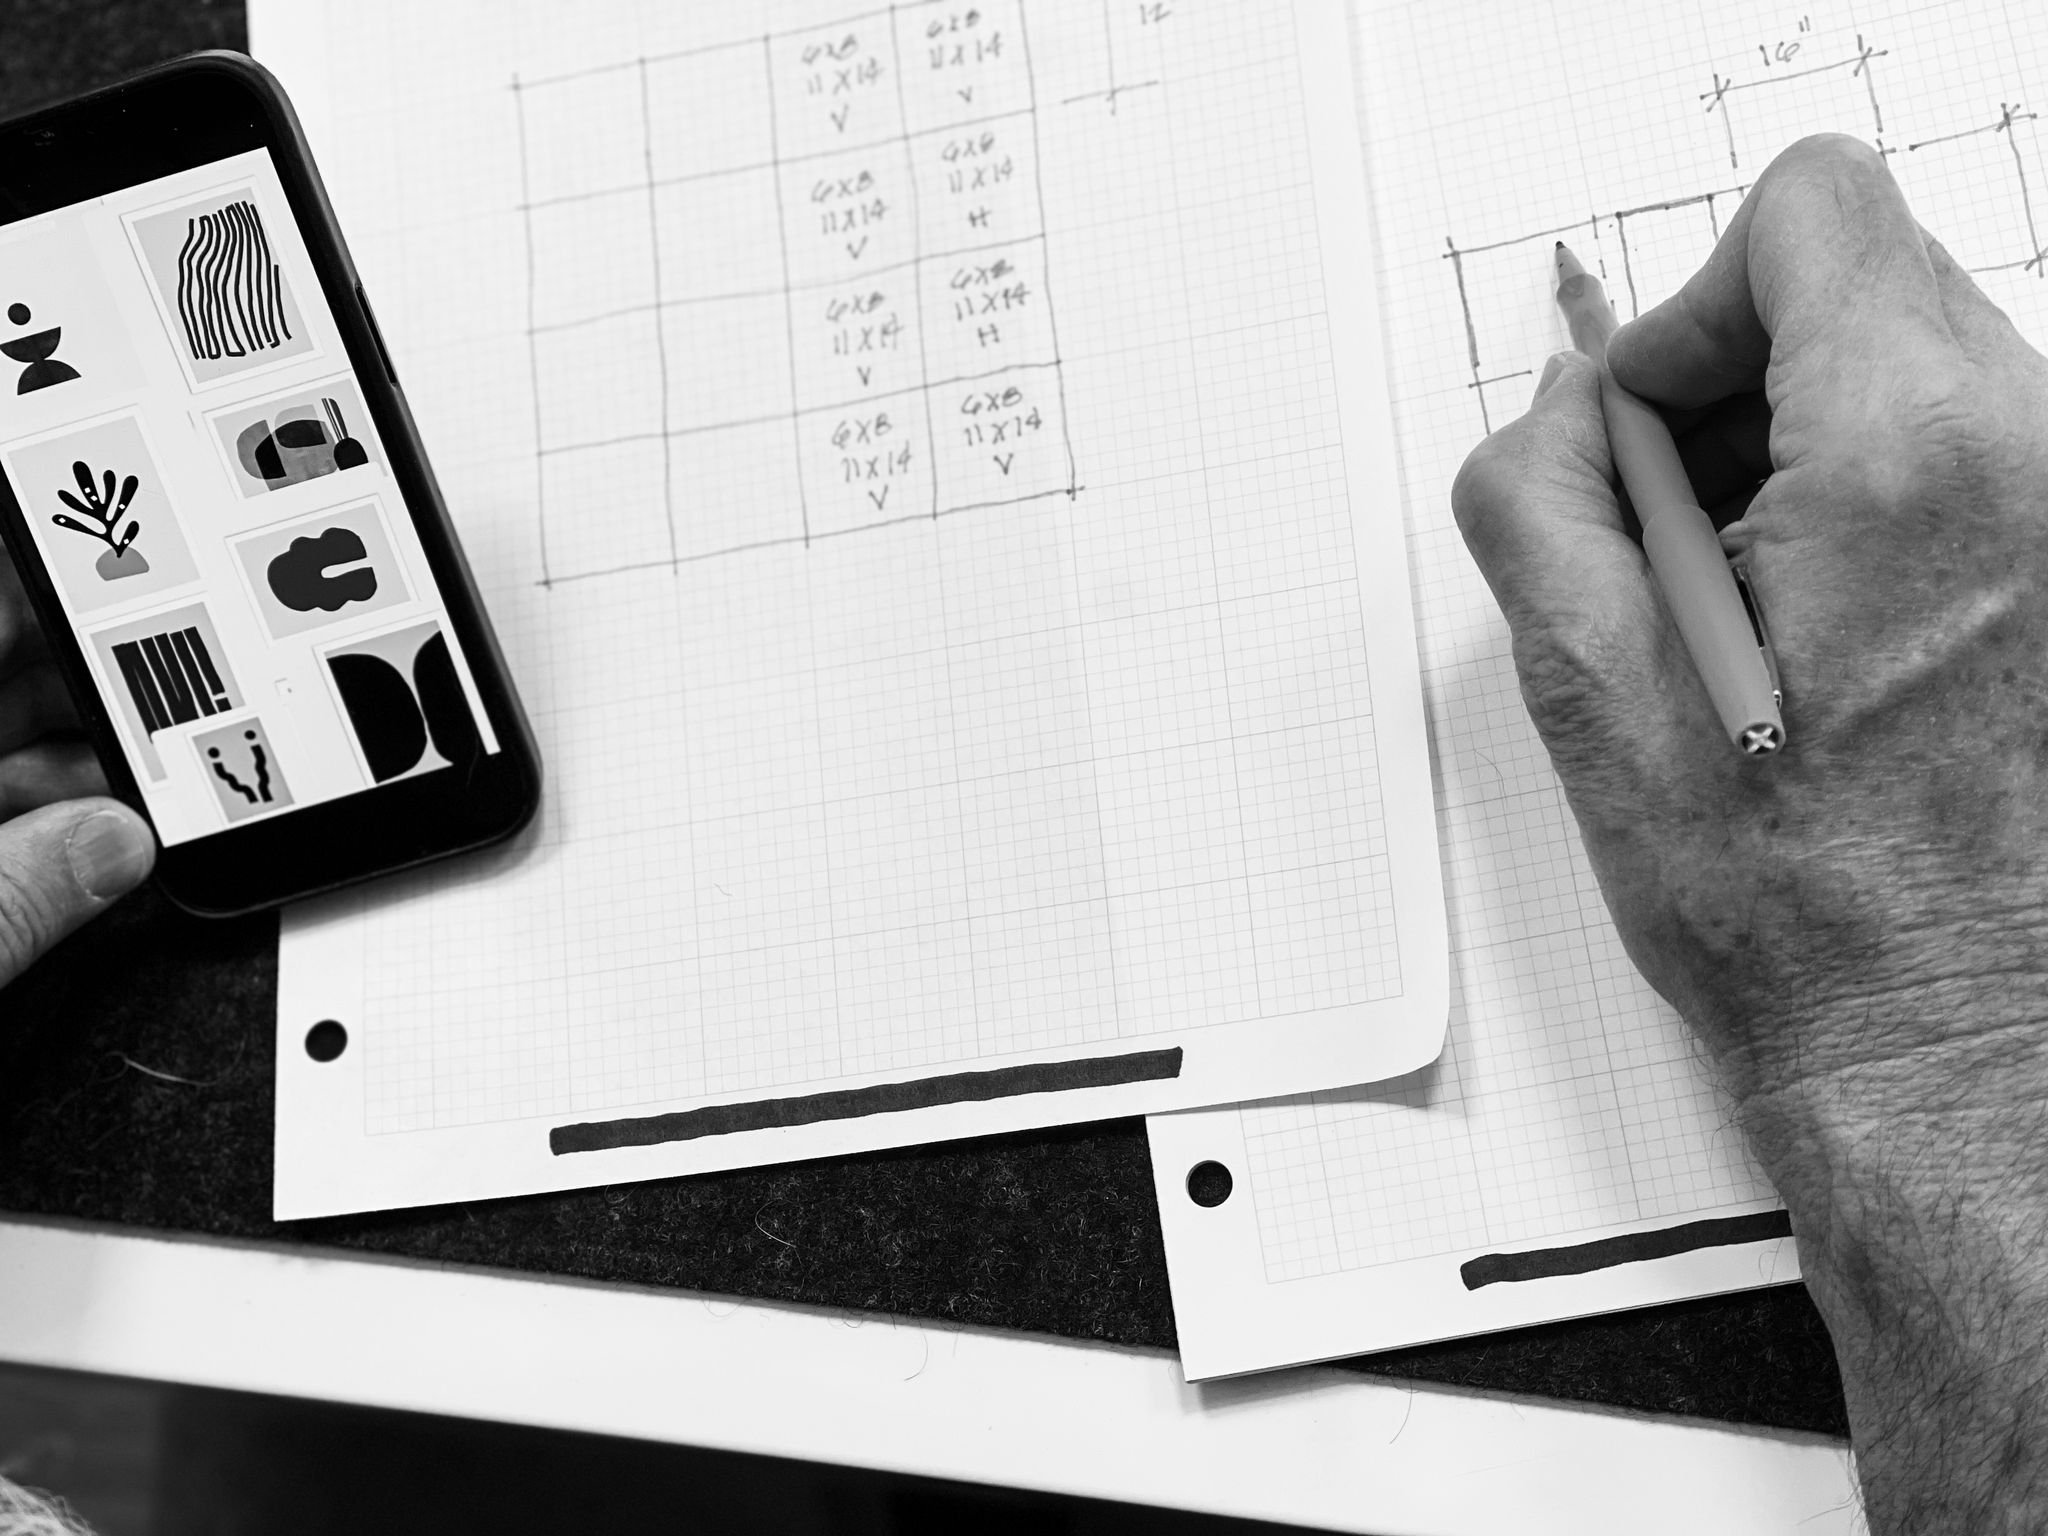
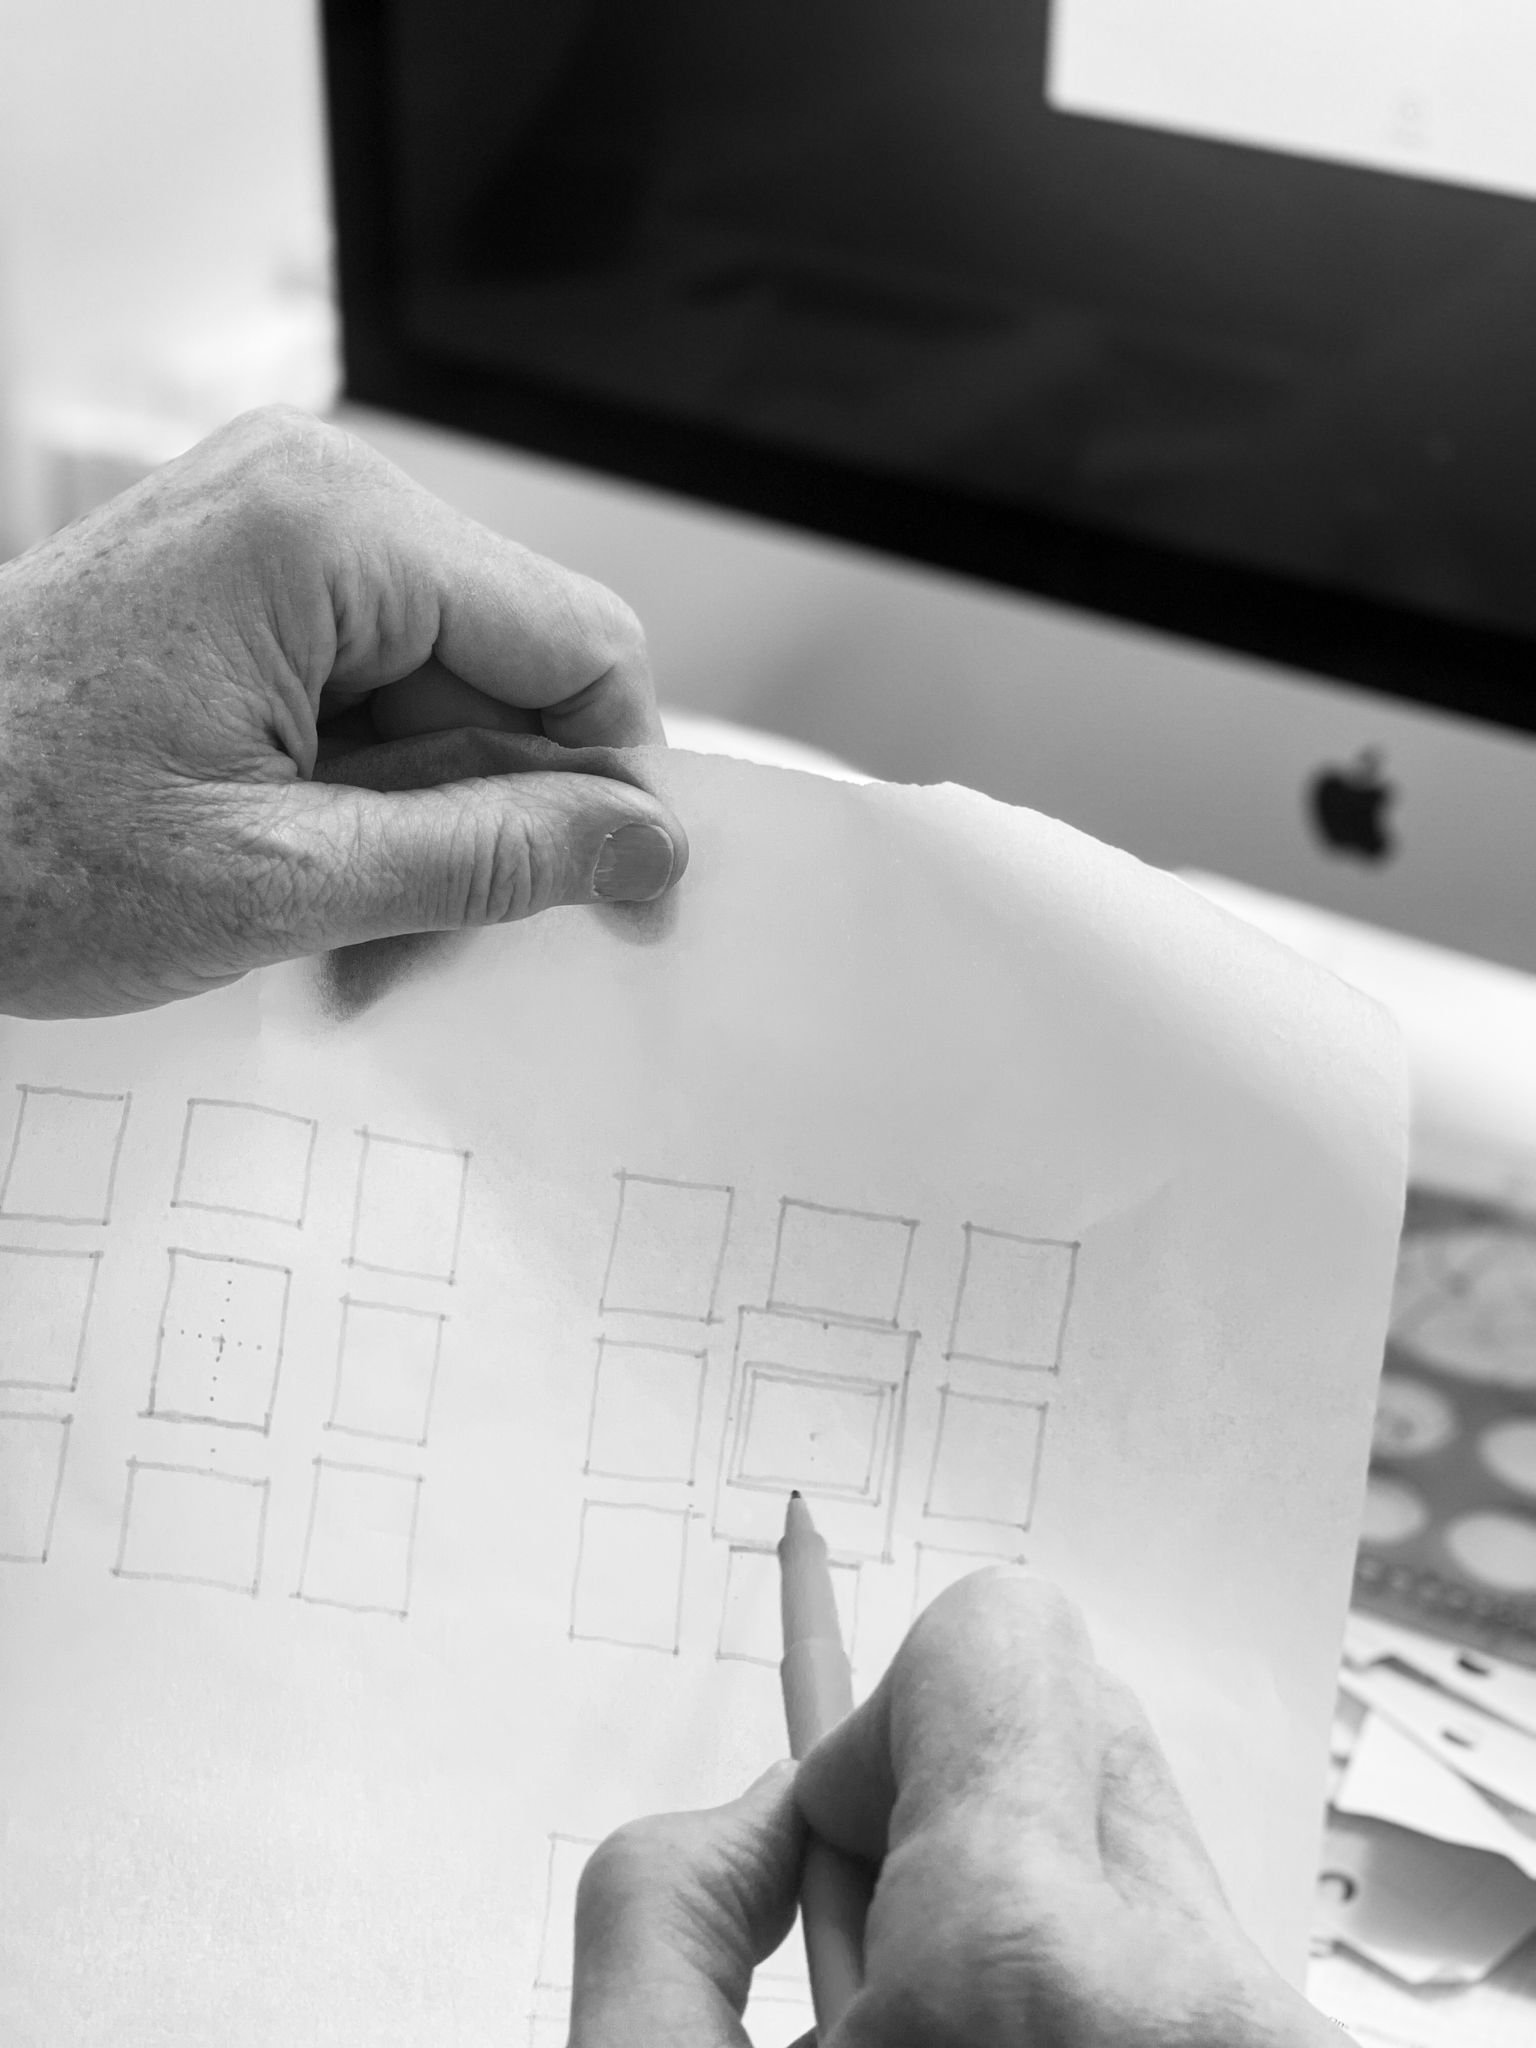
You’ve already decided the space you want to fill with your grid and how many total pieces you want in that space. Now, take the total width of the space and divide it by the number of frames you want, accounting for about 2 inches between each one. It can help to sketch your plan out and write down the numbers as you go. And it’s okay if your sketch changes a few times too. Ours sure did! You can also create a collage in your phone and play with the organization of the pieces too. Just download the photos in the Fy! Studio and save them to your phone.
We tried a few several layouts and picked the one we loved most!
So, if your space is 70 inches wide and you know you want your grid to be three frames wide, here's where you'd land:
70 inches minus 4 inches (two 2-inch gaps between three frames) is 66 inches;
66 divided by 3 frames is 22.
So, each frame should be 22 inches long.
Do the exact same thing with the height to determine how tall each frame should be.
To figure out how big you’ll need each photo to be, just subtract the width of the frame and mat from the width you determined in Step 2. In our example, let's assume the frame is one inch and the mat is three inches.
The 1-inch frame plus 3-inch mat is 4 inches;
4 x 2 (the right side and the left side) is 8 inches.
22 (the size of the frame) minus 8 (for frame and matting) is 16.
Each photo should be 16 inches wide.

Highly recommend Fy! if you are looking for beautiful wall art for your home!! (Use code GOFRENCHYOURSELF for savings) And especially if you are looking to create a gallery wall. I will show you more pics of our finished project soon along with some tips on how to now hang the beautiful art you purchased. And thanks so much to Fy! for partnering with me on this bedroom project!!!